The fundamental challenge of photography is capturing a three-dimensional world onto a two-dimensional surface. Every photo is flat. Yet some photos feel like you could walk into them, while others feel like looking at wallpaper.
The difference comes down to perceived depth, the visual cues that trick the brain into sensing three dimensions even though it's looking at two.
Learning to create depth transforms flat snapshots into immersive images. It's what separates photos people glance at from photos people get lost in, and it's a key skill we cover throughout our composition guide.
Why Photos Lose Depth
Your eyes perceive depth through multiple cues: stereoscopic vision (two slightly different viewpoints), motion parallax (things moving differently at different distances), and focus changes as you look around.
Cameras eliminate all of these, and a photograph provides only monocular depth cues, which is visual information that works from a single, fixed viewpoint. Everything your eyes use to sense three dimensions directly is gone.
Photos feel flat when they fail to replace those lost cues with compositional ones. The brain looks for depth information, finds none, and perceives flatness.
Your job is to build depth cues back in deliberately.
The Seven Depth Cues
These visual signals tell viewers that some things are near and others are far:
1. Overlapping
When one object partially blocks another, the brain knows the blocking object is closer. This is the simplest and most reliable depth cue.
Overlapping is so fundamental that even abstract shapes create depth relationships when they overlap. Use it deliberately: position elements so they partially obscure one another.
2. Size Differences
We expect similar objects to be similar sizes. When one appears smaller than another, we perceive it as farther away.
This works strongly with recognizable objects (people, cars, trees) and weakly with unfamiliar ones. Including objects of known size at different apparent sizes creates clear depth relationships.
3. Vertical Position
Objects higher in the frame typically appear farther away (up to the horizon). This matches how we see the world: near objects appear low in our visual field; distant objects appear higher.
Below the horizon, higher = farther. Above the horizon, lower = farther.
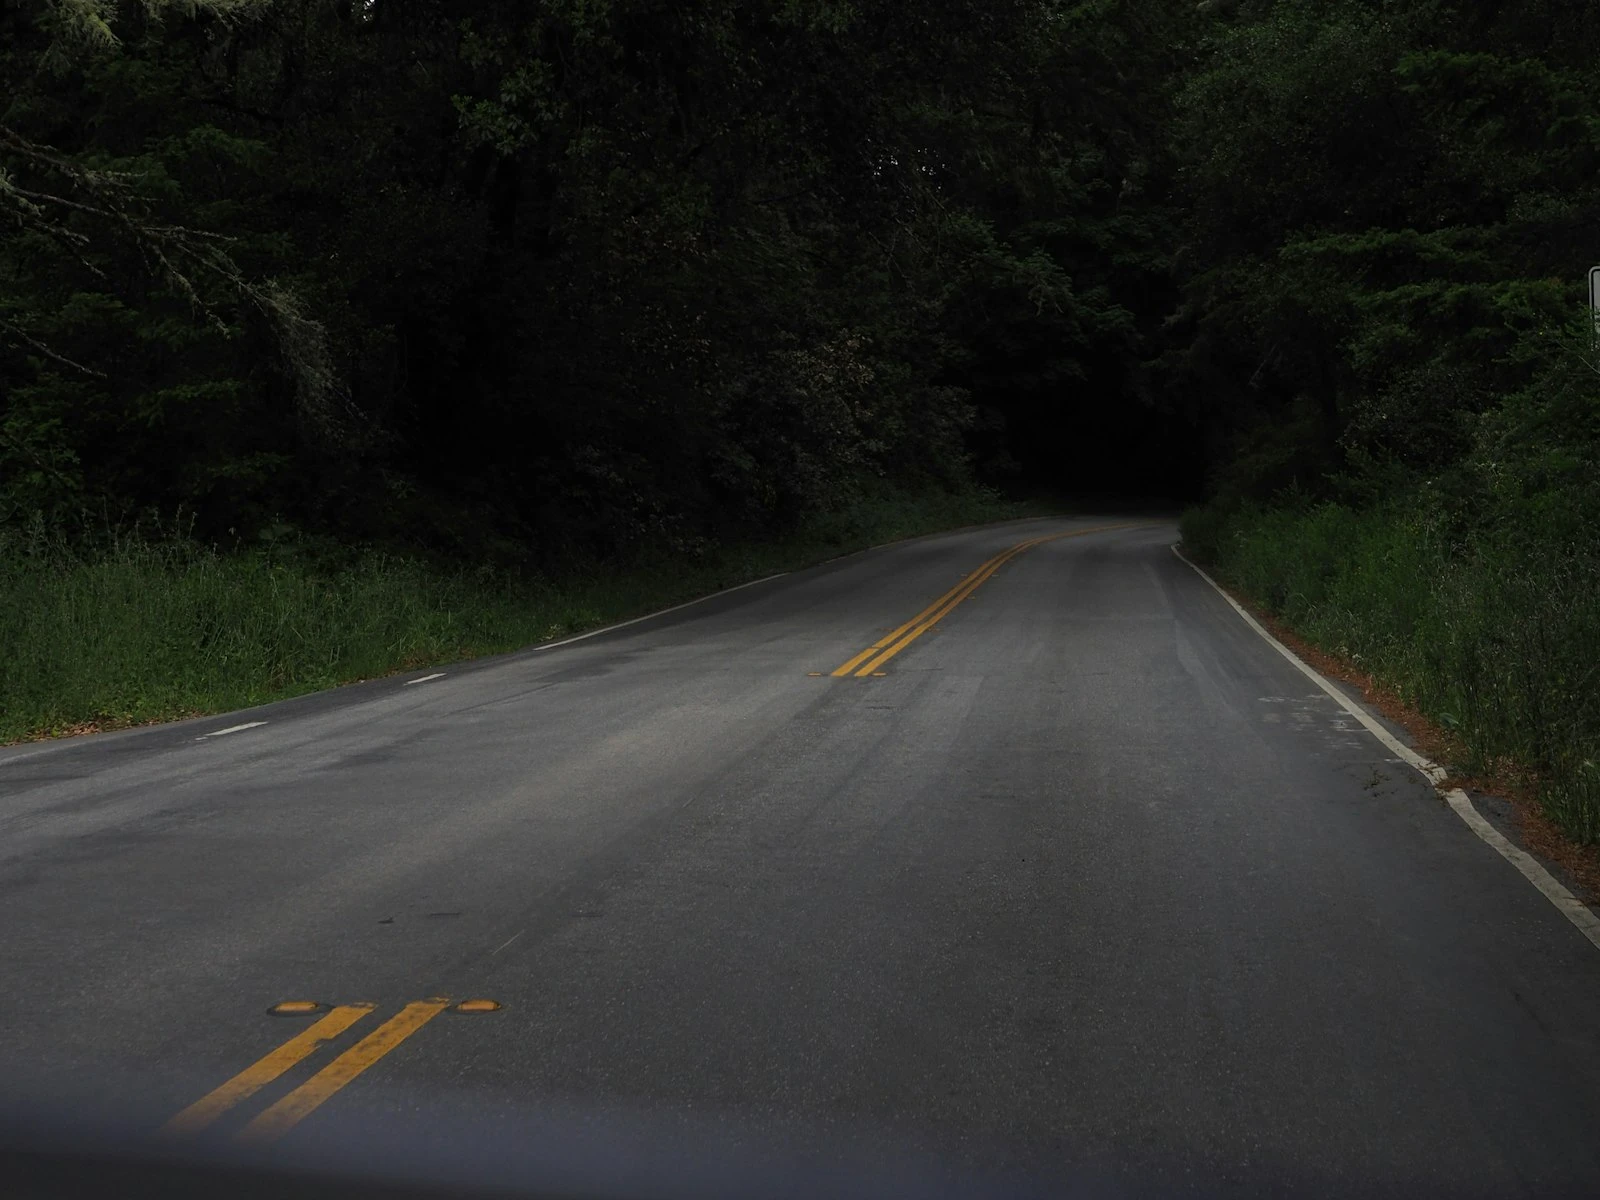
4. Linear Perspective
Parallel lines appear to converge as they recede. Roads, buildings, rows of trees: any parallel edges create depth through their convergence toward a vanishing point. Leading lines that converge in the distance are one of the strongest depth-building tools available.
This is one of the strongest depth cues and especially powerful in landscapes and architectural photography.
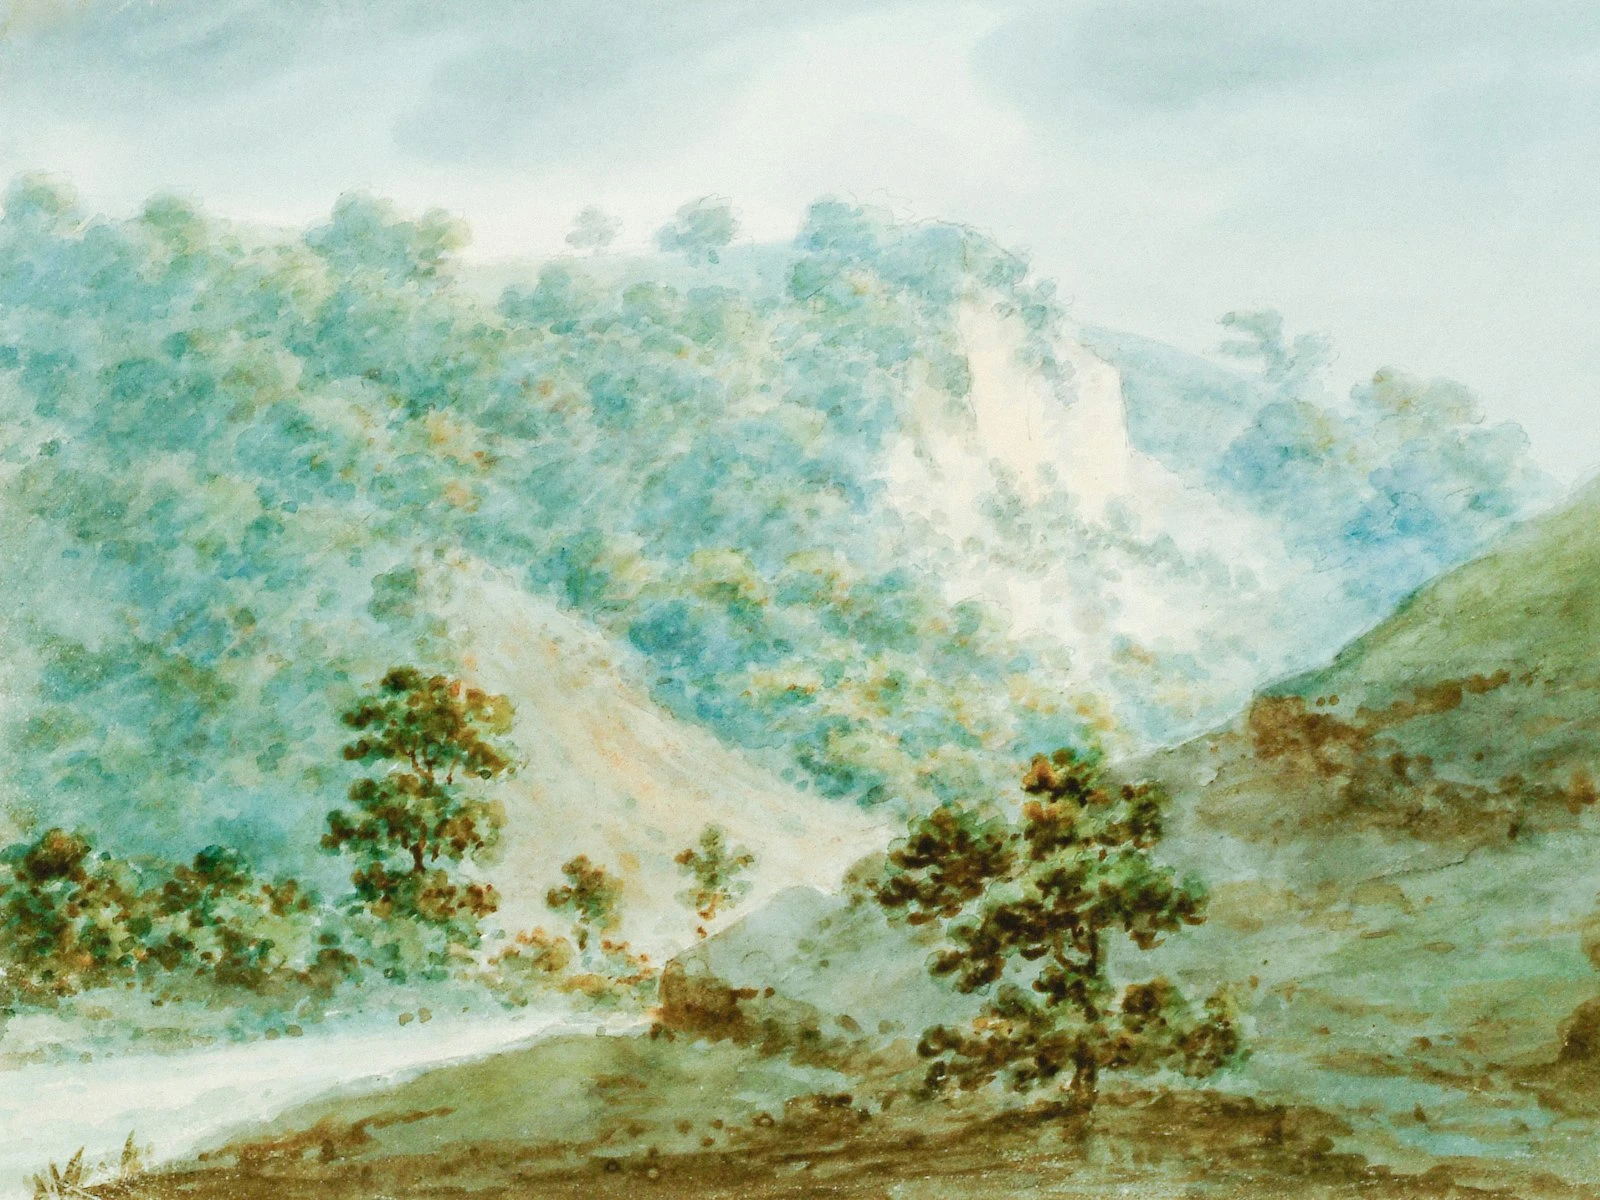
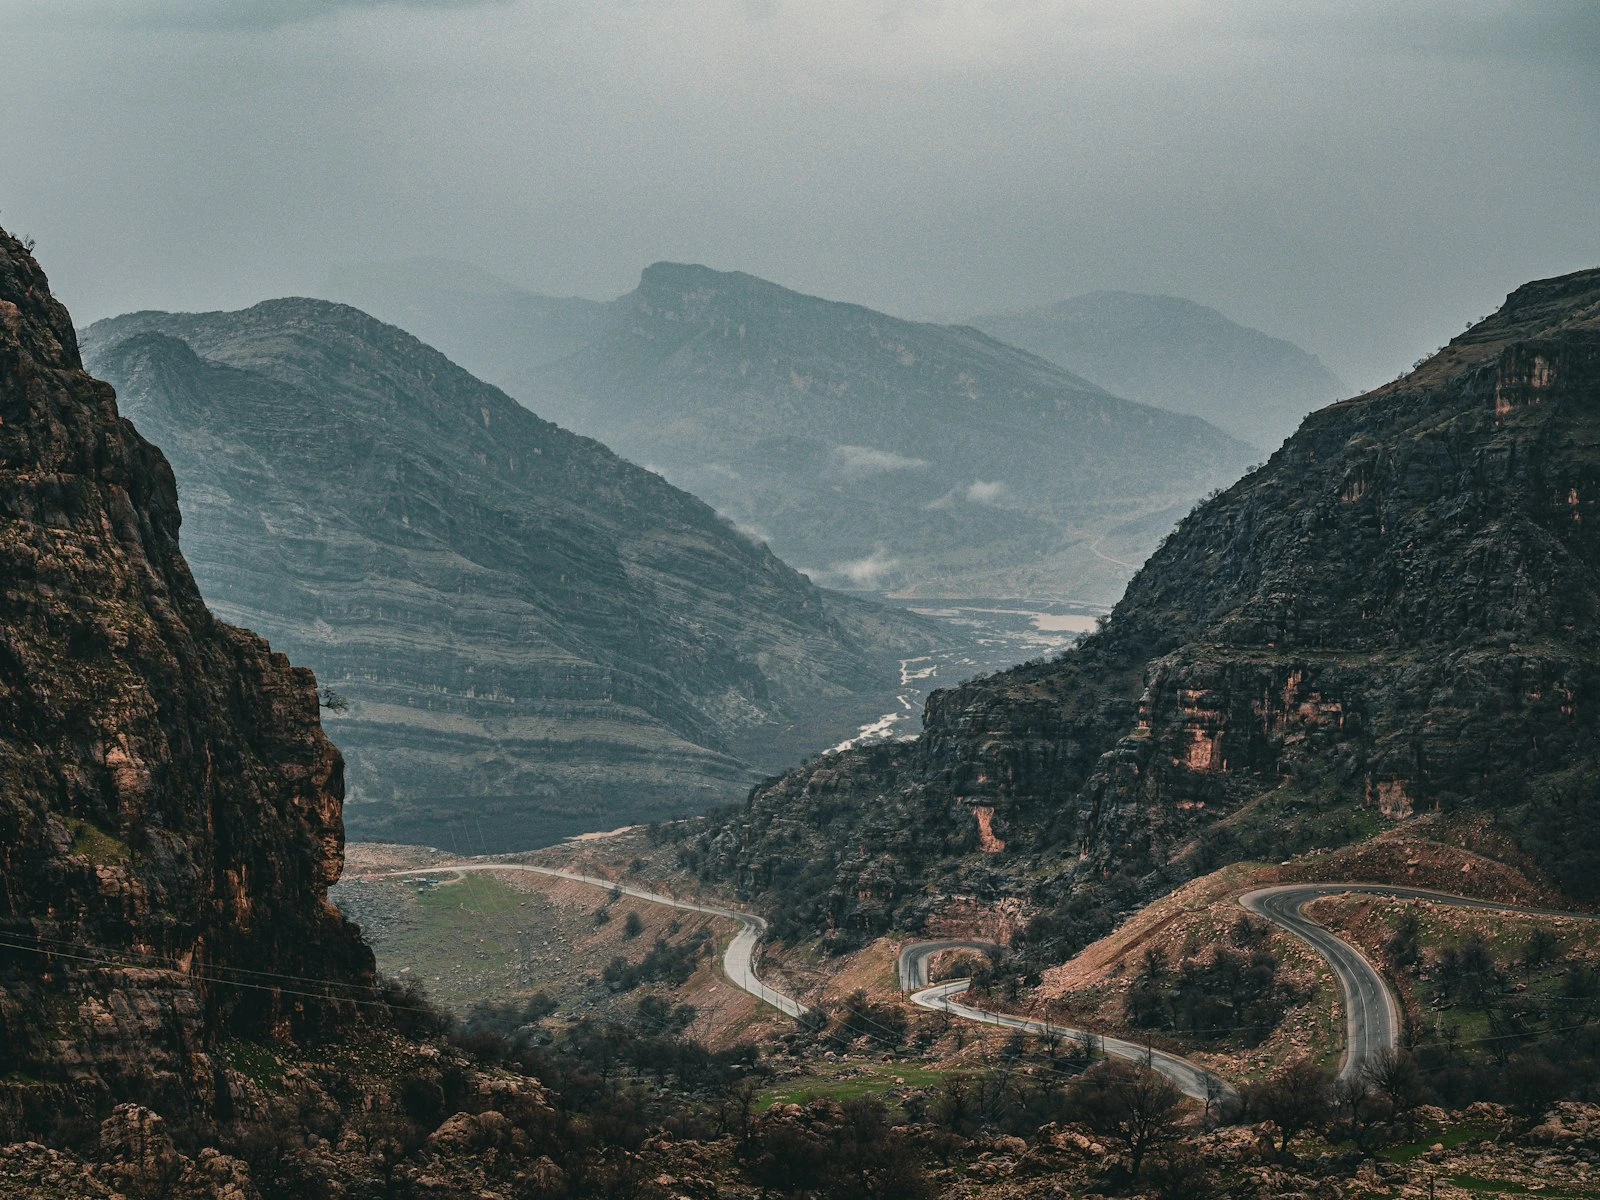
5. Atmospheric Perspective
Distant objects appear lighter, less saturated, and bluer than near objects due to atmospheric haze. Even in clear air, subtle atmospheric effects exist.
This creates natural depth in landscapes and can be enhanced in post-processing. Near objects should have more contrast and saturation than distant ones.
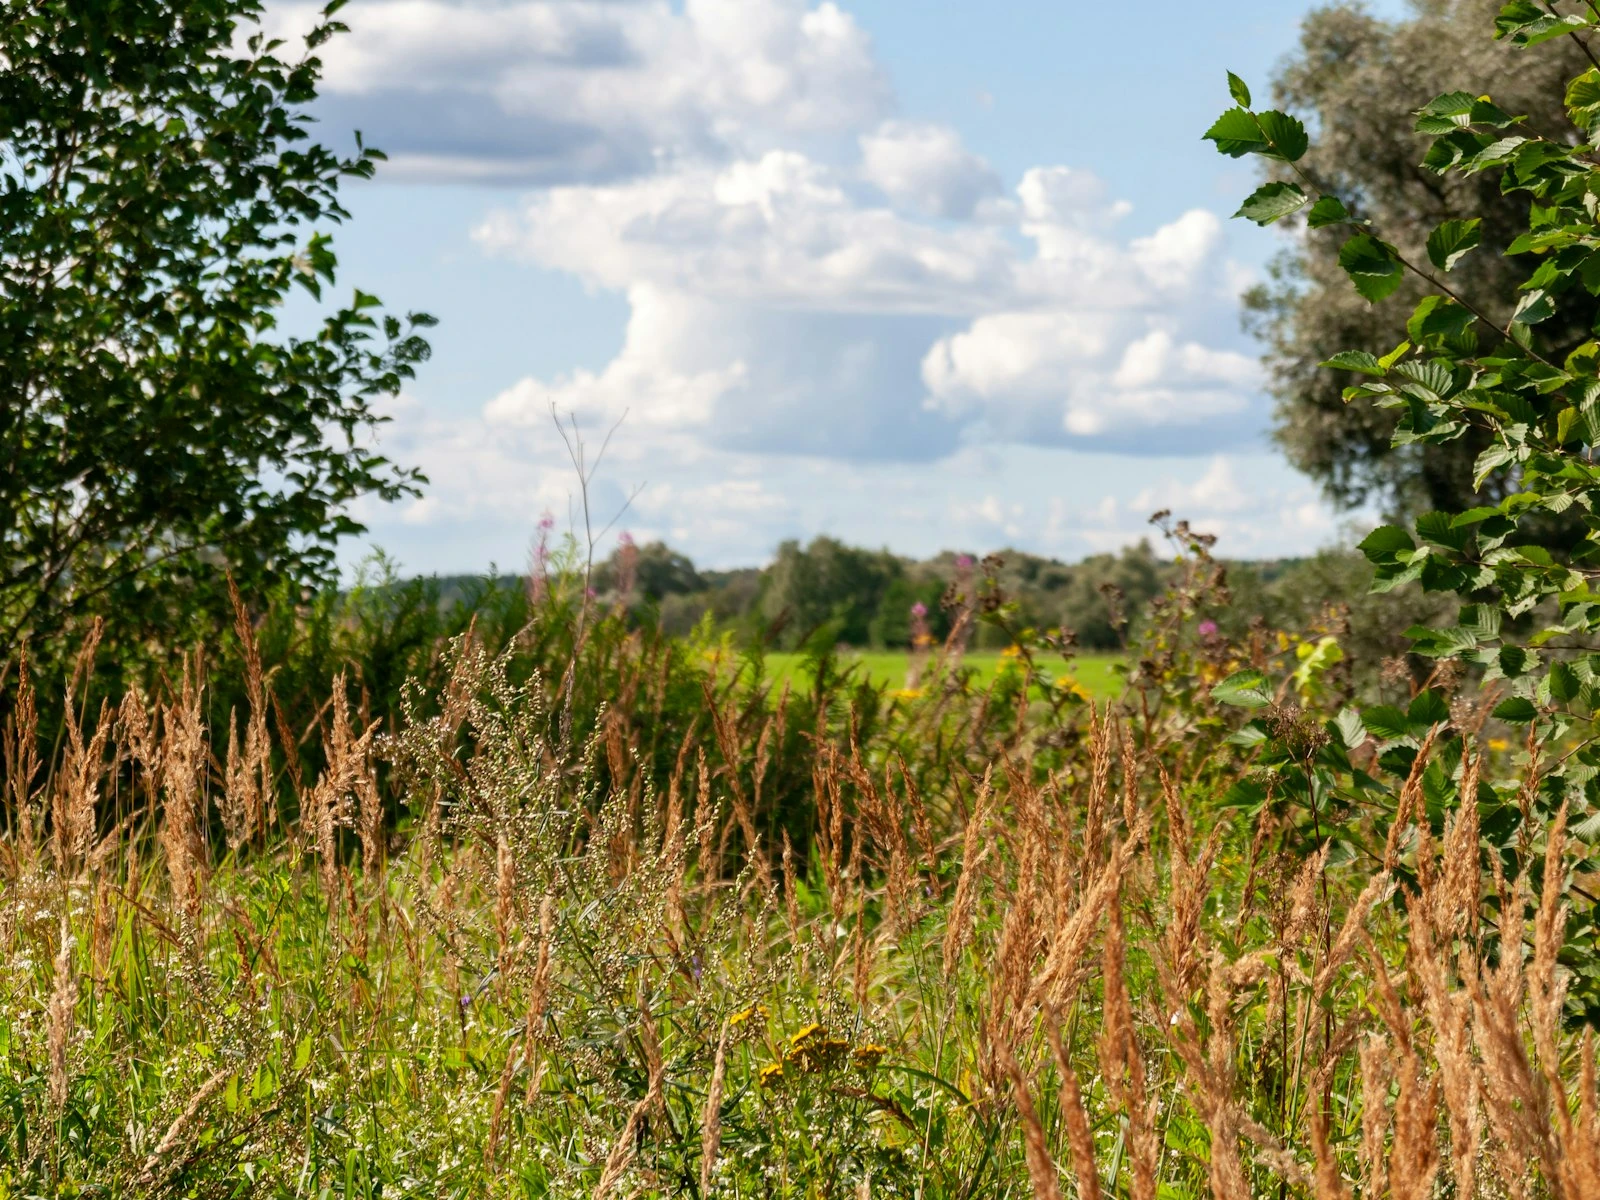
6. Texture Gradient
Textures appear finer and more compressed with distance. Near grass shows individual blades; distant grass becomes a smooth field. Near brick shows mortar lines; distant brick becomes solid color.
Including textured surfaces from near to far creates a gradient that reads as depth.
7. Focus Differences
Sharp subjects appear present and immediate; blurred areas recede. Shallow depth of field creates separation between focal planes that the brain interprets as physical depth.
This is one of few depth cues you control directly through camera settings.
Building Depth Into Compositions
Include Strong Foreground Elements
The most reliable depth-building technique is putting something interesting in the foreground.
Without foreground interest, images start at the middle distance with no "near" to contrast with "far." Adding foreground elements creates an anchor point, and everything behind it gains relative depth.
Foreground elements work best when they:
- Are sharp (usually)
- Relate to the scene rather than feeling random
- Don't completely block or distract from the main subject
- Create leading lines or frames that guide attention deeper
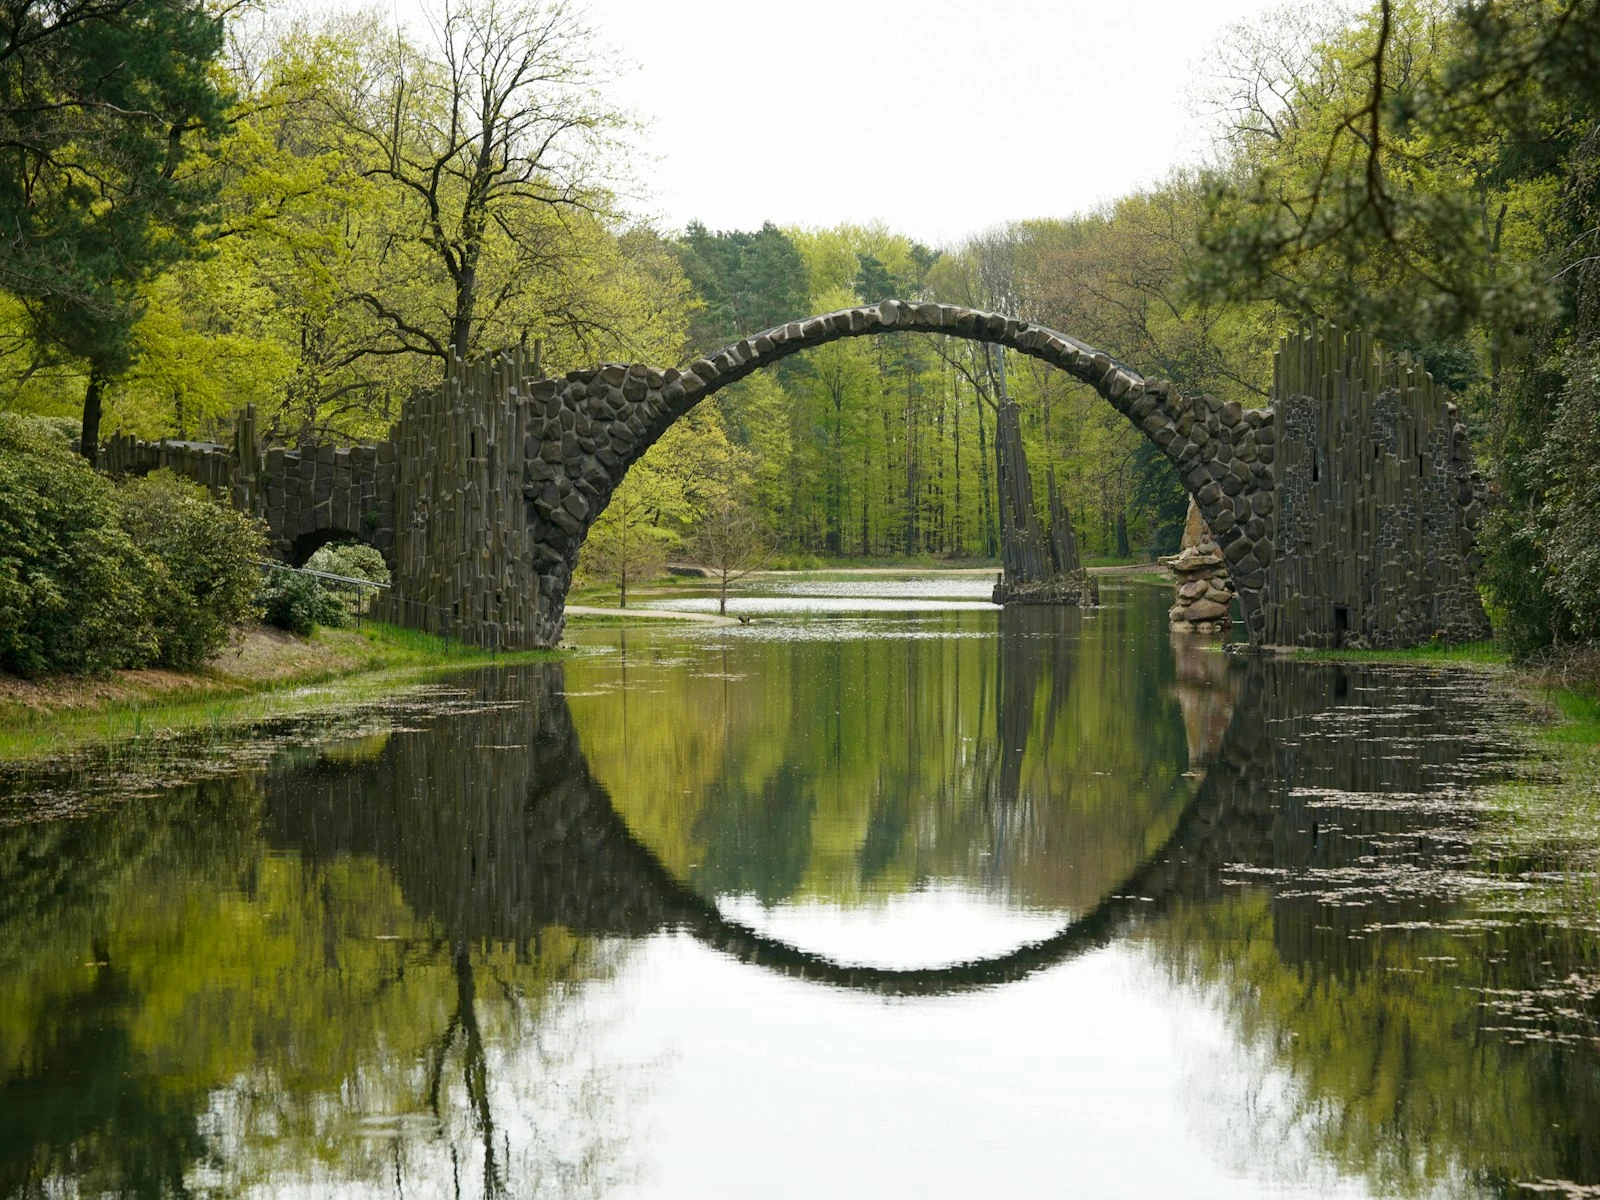
Use Layers
Think of your scene as having three distinct layers: foreground, midground, and background. Compose to include all three.
- Foreground: immediate, near, often showing texture and detail
- Midground: where primary subjects often sit, the heart of the image
- Background: distant, often simplified, providing context
Images that collapse into a single plane (everything at the same apparent distance) feel flat. Images with clear separation between layers feel deep.
Find Converging Lines
Linear perspective is powerful. Any time you can include lines that visibly converge toward a distant point, you create strong depth cues.
Roads, fences, railways, architecture, and rows of any kind are all depth machines. Position yourself to emphasize the convergence rather than diminish it.
Wide-angle lenses exaggerate linear perspective; telephoto lenses compress it. Choose focal length partly based on how much perspective depth you want.
Exploit Atmospheric Conditions
Haze, fog, and mist separate visual planes clearly. Each layer of depth disappears a bit more into the atmosphere, creating obvious front-to-back relationships.
On clear days, you can simulate some of this in editing by:
- Reducing contrast in distant areas
- Slightly desaturating backgrounds
- Adding subtle blue tints to distant elements
Just don't overdo it, since heavy-handed atmospheric processing looks artificial.
Separate Planes with Focus
Shallow depth of field puts some elements sharp and others soft. Sharp elements feel present; soft elements recede.
Use aperture and subject-to-background distance to create separation:
- Wide apertures (low f-numbers) decrease depth of field
- Greater distance between subject and background increases apparent blur
This is especially effective for isolating subjects from backgrounds, but works in any situation where you want clear plane separation.
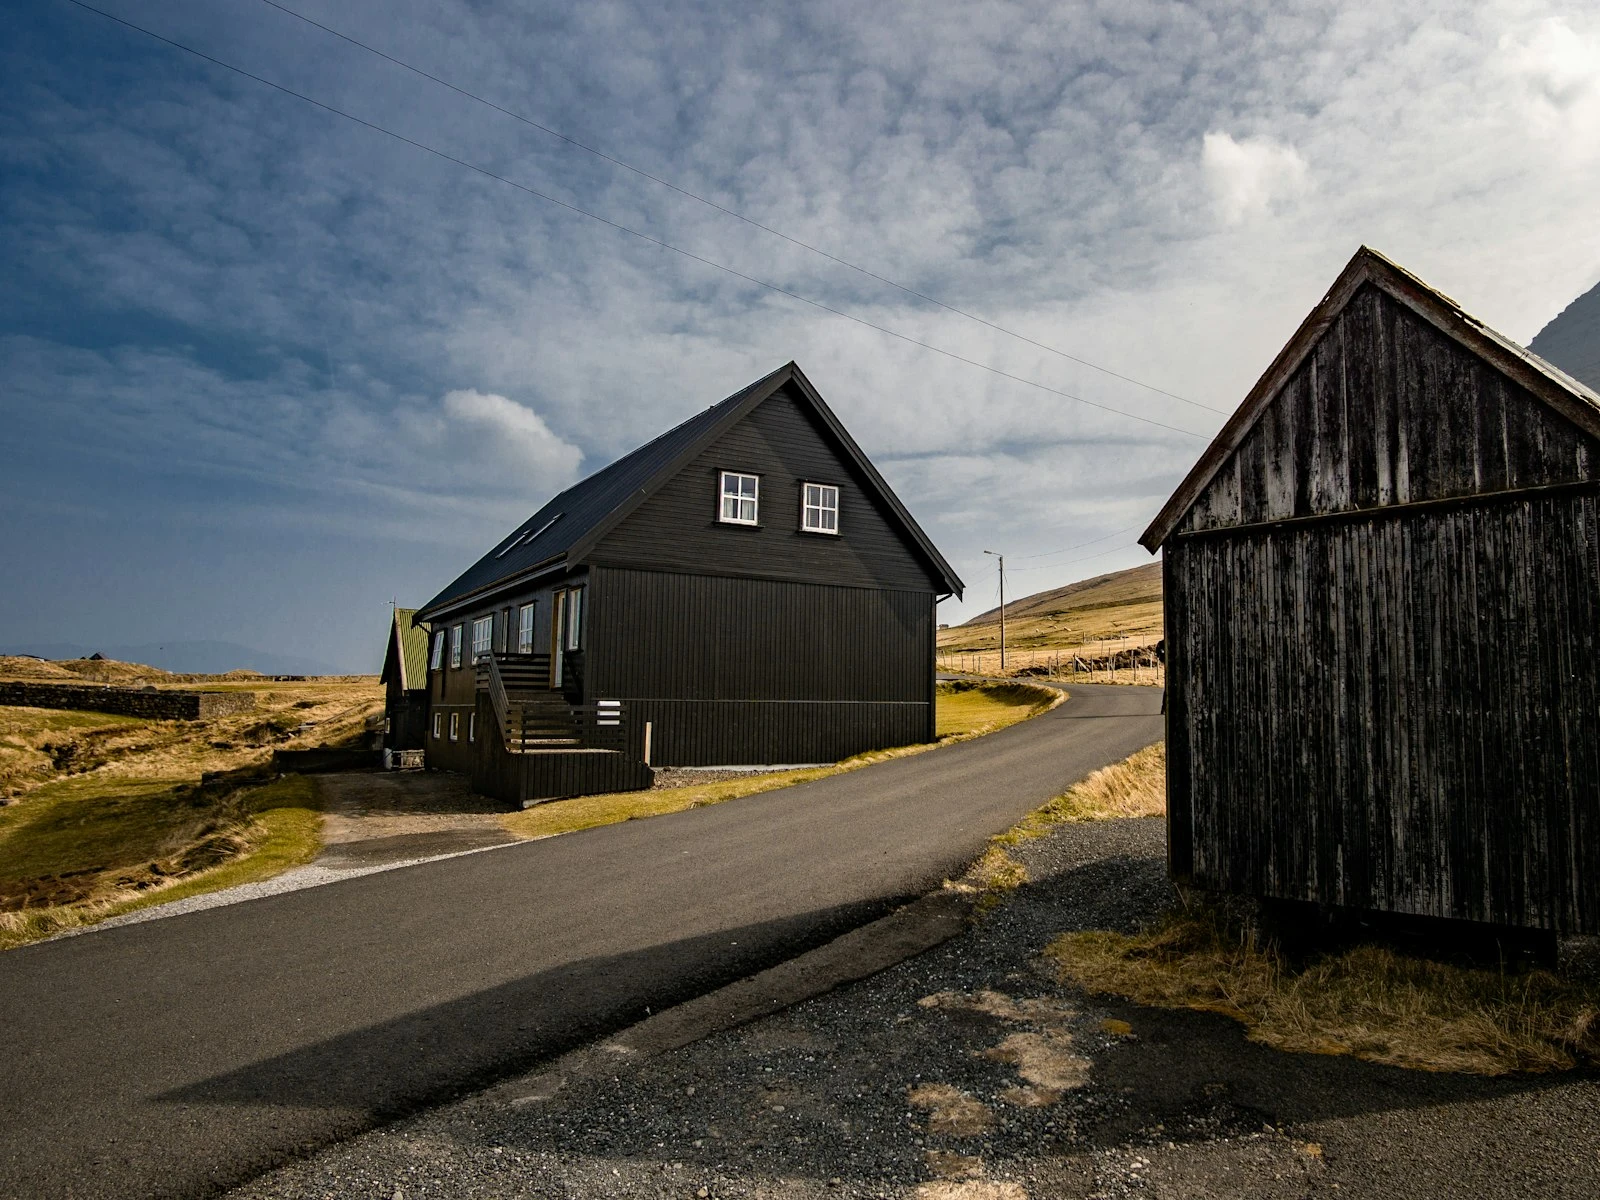
Use Light Direction
Side lighting and back lighting create shadows and highlights that reveal form and depth. Flat frontal lighting eliminates these cues.
Shadows on a surface tell you that surface has depth. Shadows behind objects tell you those objects project from the background. Without shadows, everything flattens.
When possible, choose times and positions that create dimensional lighting rather than flat illumination.
Create Size Relationships
Including objects of known size at different distances gives the brain scale information it can process as depth.
A person close to the camera and another person far away creates immediate depth perception because we know people are similar sizes. The same works with trees, cars, buildings, and anything recognizable.
Common Depth Killers
The Middle Distance Trap
Photos that start in the middle distance have nowhere to go because there's no foreground anchor, so everything feels like it's at the same remove.
Get lower, move forward, find something to include in the near field.
Flat Light
Overcast days and frontal light eliminate shadows and form, so everything becomes surface without depth.
Wait for better light, find angles that create shadows, or accept that this image may feel flatter than ideal.
Background Merger
When subjects blend into backgrounds with similar colors, tones, and textures, depth collapses because there's nothing telling the brain that subject and background are in different places.
Create separation through tonal, color, or focus contrast.
Compressed Compositions
Telephoto lenses compress depth, making planes that are actually far apart appear stacked together.
This can be useful stylistically, but if depth is your goal, consider wider angles that expand spatial relationships.
Single-Plane Scenes
Sometimes the scene itself is genuinely flat, like a wall, a floor, or a single surface. These subjects resist depth creation.
Either embrace the flatness (make it graphically interesting) or find a way to introduce depth (an object in front, a shadow, a perspective shift).
Practice: Depth Layers
Find a landscape scene and photograph it multiple ways:
- From standing height, pointed straight ahead (the snapshot approach)
- From a lower position with a strong foreground element
- Emphasizing converging lines (find an angle that maximizes perspective)
- With shallow depth of field separating planes (if your lens allows)
- With something framing the scene from the front
Compare the results. Notice which techniques create the strongest sense of depth for this particular scene.
Different subjects respond to different depth techniques. Building a repertoire lets you choose the right approach for each situation.
Key Takeaways
- Include strong foreground elements to anchor "near" in contrast with "far," which is the most reliable technique for adding depth to flat photos.
- Use converging lines like roads, fences, and architectural edges to create powerful linear perspective that pulls viewers into the image.
- Exploit atmospheric conditions like haze and fog to separate visual planes, or simulate the effect in editing by reducing contrast and saturation in distant areas.
- Side lighting and back lighting create shadows that reveal form and depth, while flat frontal lighting eliminates those cues and flattens images.
- Get lower to bring foreground into prominence and use wide-angle lenses to exaggerate spatial relationships between near and far elements.
More in This Guide
Continue exploring composition techniques.