Cities transform at night. The harsh daylight that creates harsh shadows and busy visual chaos gives way to selective illumination: windows glowing against dark facades, strings of street lights creating paths through the urban landscape, neon signs adding color to the darkness.
Photographing city lights is about understanding how artificial light shapes urban spaces and using that light as both subject and atmosphere. It's one of the most visually rewarding topics in our low light guide.
Planning Your City Night Shoot
Successful urban night photography starts before you leave home. Unlike daytime shooting where good light comes and goes with weather, city lights follow predictable patterns you can research and plan around.
Timing: The Blue Hour Advantage
The best city light photographs often happen during blue hour, roughly 20-40 minutes after sunset, when the sky retains color and detail while artificial lights are already on.
Why blue hour works:
- Sky has color and gradient, not just black
- Building lights visible against still-bright sky
- More balanced dynamic range (less extreme highlight/shadow contrast)
- Enough ambient light to see detail in unlit areas
Pure night photography (1+ hours after sunset) produces dramatic contrast but loses sky detail and can feel harsh. The black sky requires careful composition to avoid emptiness in the frame.
Scouting and Location Research
Before your shoot:
- Visit potential locations during daylight to understand the layout
- Note where you can set up a tripod safely
- Identify compositions that include interesting foreground, middle ground, and background
- Check for obstacles, fences, or restricted access
- Note the direction of sunset relative to your composition
Use online tools:
- Google Maps satellite view for location overview
- Street View for ground-level composition scouting
- The Photographer's Ephemeris or PhotoPills for sun/twilight timing
- Instagram geotags to see what others have shot from the location
Weather Considerations
Clear skies provide clean backgrounds and crisp light, but can feel stark.
Light cloud cover adds texture to the sky and can catch city glow, creating more atmosphere.
Rain creates reflections on wet surfaces, doubling lights and adding texture. Shooting during or just after rain produces unique results.
Fog and mist diffuse lights into atmospheric glows, reducing contrast and creating mood. Can obscure distant views but adds mystery.
Essential Camera Settings
Base Settings for City Lights
Mode: Manual (M) for consistent results ISO: 100 or your camera's base ISO Aperture: f/8 for overall sharpness, f/11-f/16 for starburst effects Shutter speed: Determined by exposure needs, often 10-30 seconds at f/8 White balance: Tungsten for cooler rendering, Auto for mixed results (adjust in post if shooting RAW) Focus: Manual, focused on your main subject
Aperture Choices and Their Effects
f/8 (sharp overall):
- Most lenses perform optimally around f/8
- Point lights render as round, defined circles
- Good general-purpose setting
f/11-f/16 (starburst effect):
- Point lights gain distinctive star patterns
- Street lights and distant windows sparkle
- Number of points depends on lens aperture blade count (even blades = same number of points, odd blades = double the points, so 6 blades = 6 points, 7 blades = 14 points, 8 blades = 8 points)
- Increases exposure time
Wider than f/8:
- Shorter exposure times
- Softer overall sharpness
- Less starburst effect
- May be necessary in challenging conditions
Exposure Approach
Night city scenes have extreme dynamic range. Bright lights next to deep shadows challenge any camera.
Expose for highlights: It's easier to recover shadow detail than blown highlights. The neon sign and lit windows should retain detail, even if shadows go darker than you'd prefer.
Bracket if needed: For extreme contrast scenes, shoot multiple exposures and blend in post-processing.
Use the histogram: Your eyes adapt poorly in the dark. Trust the histogram to show actual exposure. When you need to shift settings while keeping the same brightness, work out equivalent exposures so you can adjust one variable without losing your exposure.
Working with Different Light Sources
Cities contain many types of artificial light, each with different color temperature and characteristics.
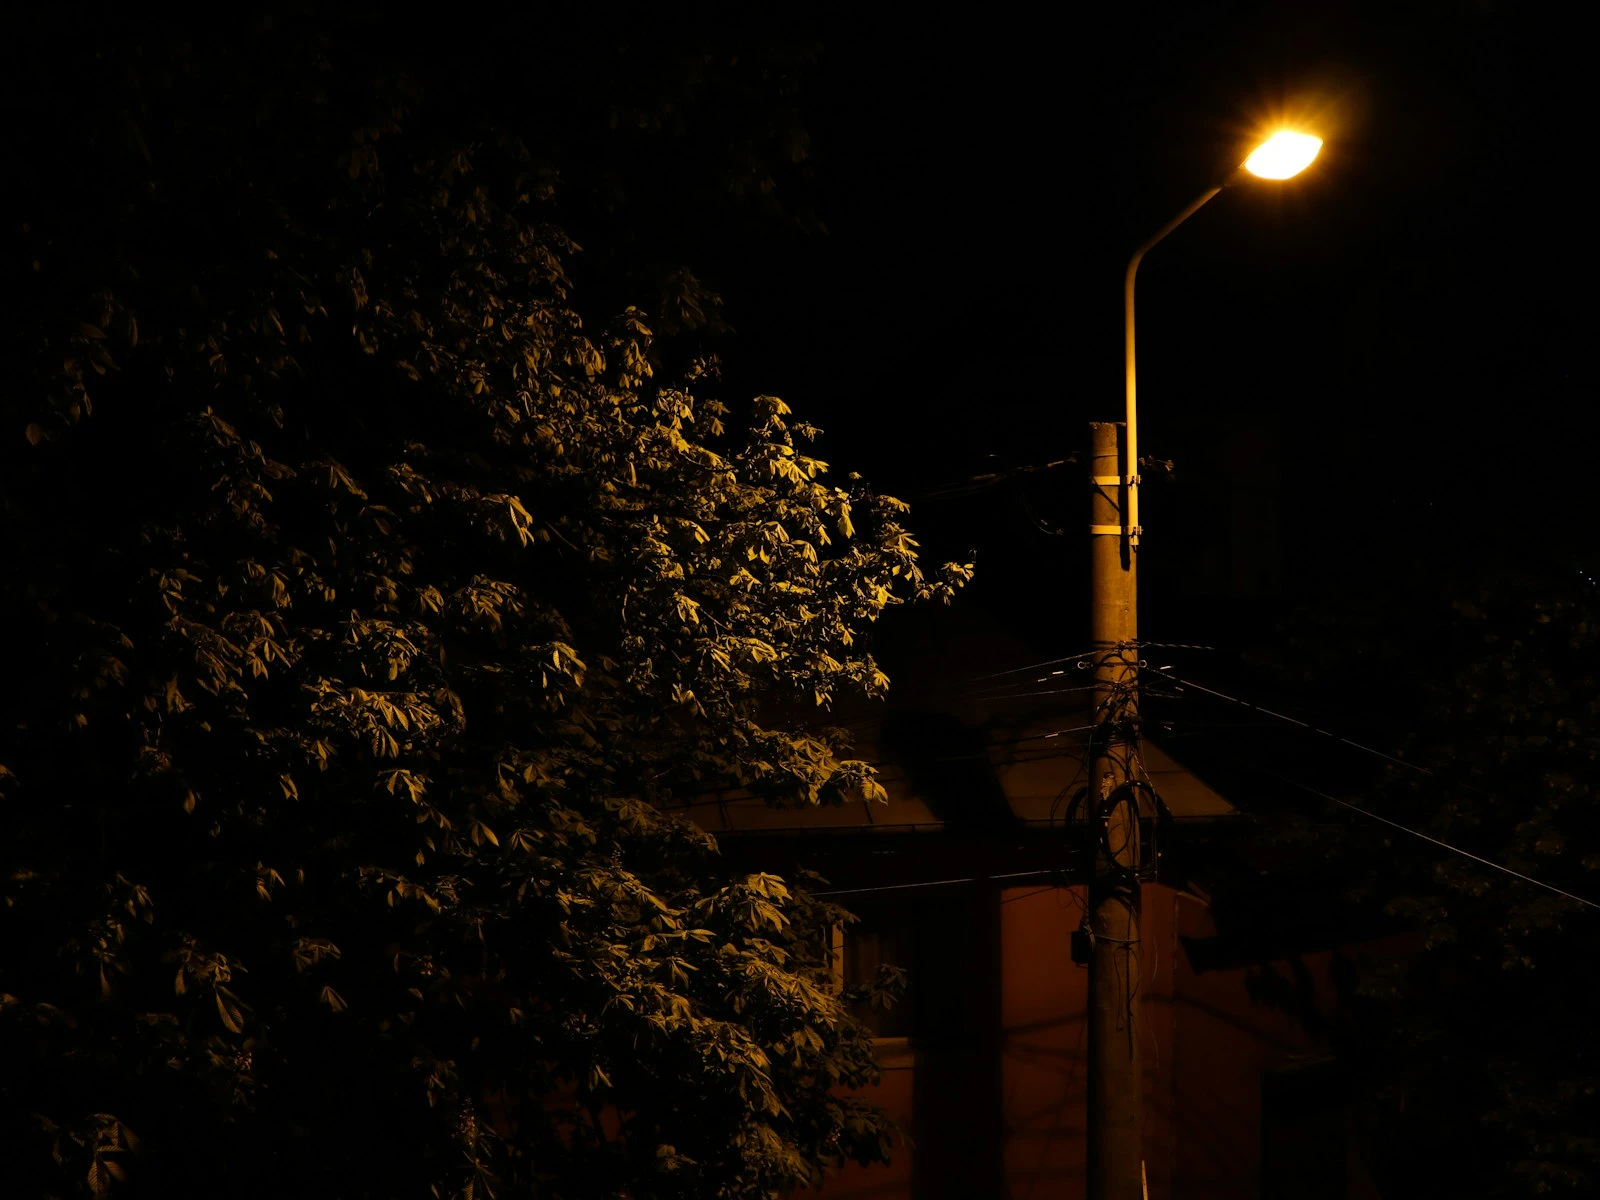
Sodium Vapor (Orange)
The warm orange glow of traditional street lights. Creates nostalgic, cinematic feel but can dominate color palette.
Tips:
- Embrace the orange rather than correcting it completely
- Creates warm pools of light surrounded by cooler areas
- Gradually being replaced by LED in many cities
LED Street Lights (Cooler White)
Modern LED lights produce cooler, more neutral light. Creates different mood than sodium vapor.
Tips:
- More neutral color balance
- Can feel harsh or clinical compared to warm alternatives
- Often produces cleaner, more modern-feeling images
Neon and Signage
Neon signs, LED displays, and commercial lighting add color variety to night scenes.
Tips:
- Neon can be very bright, so watch for blown highlights
- Include recognizable signage for sense of place
- Colored lights reflect on wet surfaces
Window Light
Interior lights visible through windows create warm patterns against dark building facades.
Tips:
- Creates life and scale in otherwise static buildings
- Best during blue hour when building structure still visible
- Random patterns add organic interest to geometric architecture
Mixed Lighting
Most city scenes combine multiple light types. This creates color complexity that can feel natural or chaotic.
Tips:
- Embrace color variety rather than trying to correct everything
- Auto white balance produces moderate results; adjust in post for preference
- Some color contrast adds interest; too much can feel messy
Composition Strategies for City Lights
Finding Order in Urban Chaos
Cities are visually busy. Night photography naturally simplifies by hiding distractions in shadow.
Use selective illumination:
- Lit elements become subjects; unlit elements disappear
- Compose to use pools of light as focal areas
- Let darkness create negative space
Leading Lines
Cities provide abundant leading lines that become more prominent at night.
Common night leading lines:
- Streets receding into distance (lit by street lights)
- Train or tram tracks
- Building edges against sky
- Light trails from traffic
- Bridge cables and structures
Reflection Opportunities
Water and wet surfaces double your lights, creating symmetry and visual complexity.
Where to find reflections:
- Rivers, harbors, and waterfronts
- Wet streets after rain
- Puddles (get low for effect)
- Glass buildings reflecting other lit structures
Framing with Architecture
Use foreground architectural elements to frame distant cityscapes.
Framing options:
- Archways and passages
- Building gaps creating view corridors
- Bridge structures
- Overpasses or elevated walkways
Including Human Scale
Completely static night cityscapes can feel sterile. Human presence adds scale and life.
Ways to include people:
- Long exposure ghosts (moving people become blurred traces)
- Stationary figures (someone standing still remains sharp)
- Lit interiors with visible occupants
- Traffic light trails suggesting human activity
Creating Light Trails
Traffic light trails are a signature element of urban night photography.
The Basics
Long exposures turn moving headlights and taillights into flowing ribbons of light.
Technical approach:
- Exposures of 15-30 seconds capture multiple vehicles
- Longer exposures accumulate more trails
- Red taillight trails are typically dimmer than white headlight trails
Positioning for Good Trails
Include roads with consistent traffic flow, enough cars to create continuous trails, not so many that traffic stops.
Compositional considerations:
- Trails leading into the frame toward the subject
- S-curves of winding roads
- Intersection patterns
- Elevated positions showing multiple traffic arteries
Timing Traffic
The best trail density depends on traffic flow:
Light traffic: Each car creates distinct trail; gaps between vehicles visible Moderate traffic: Continuous ribbons with some variation Heavy traffic: Dense, overlapping trails; can become messy
Working with traffic lights: Trails change color at intersections. Multiple exposures through a light cycle can capture both flowing and stopped patterns.
Special Urban Night Subjects
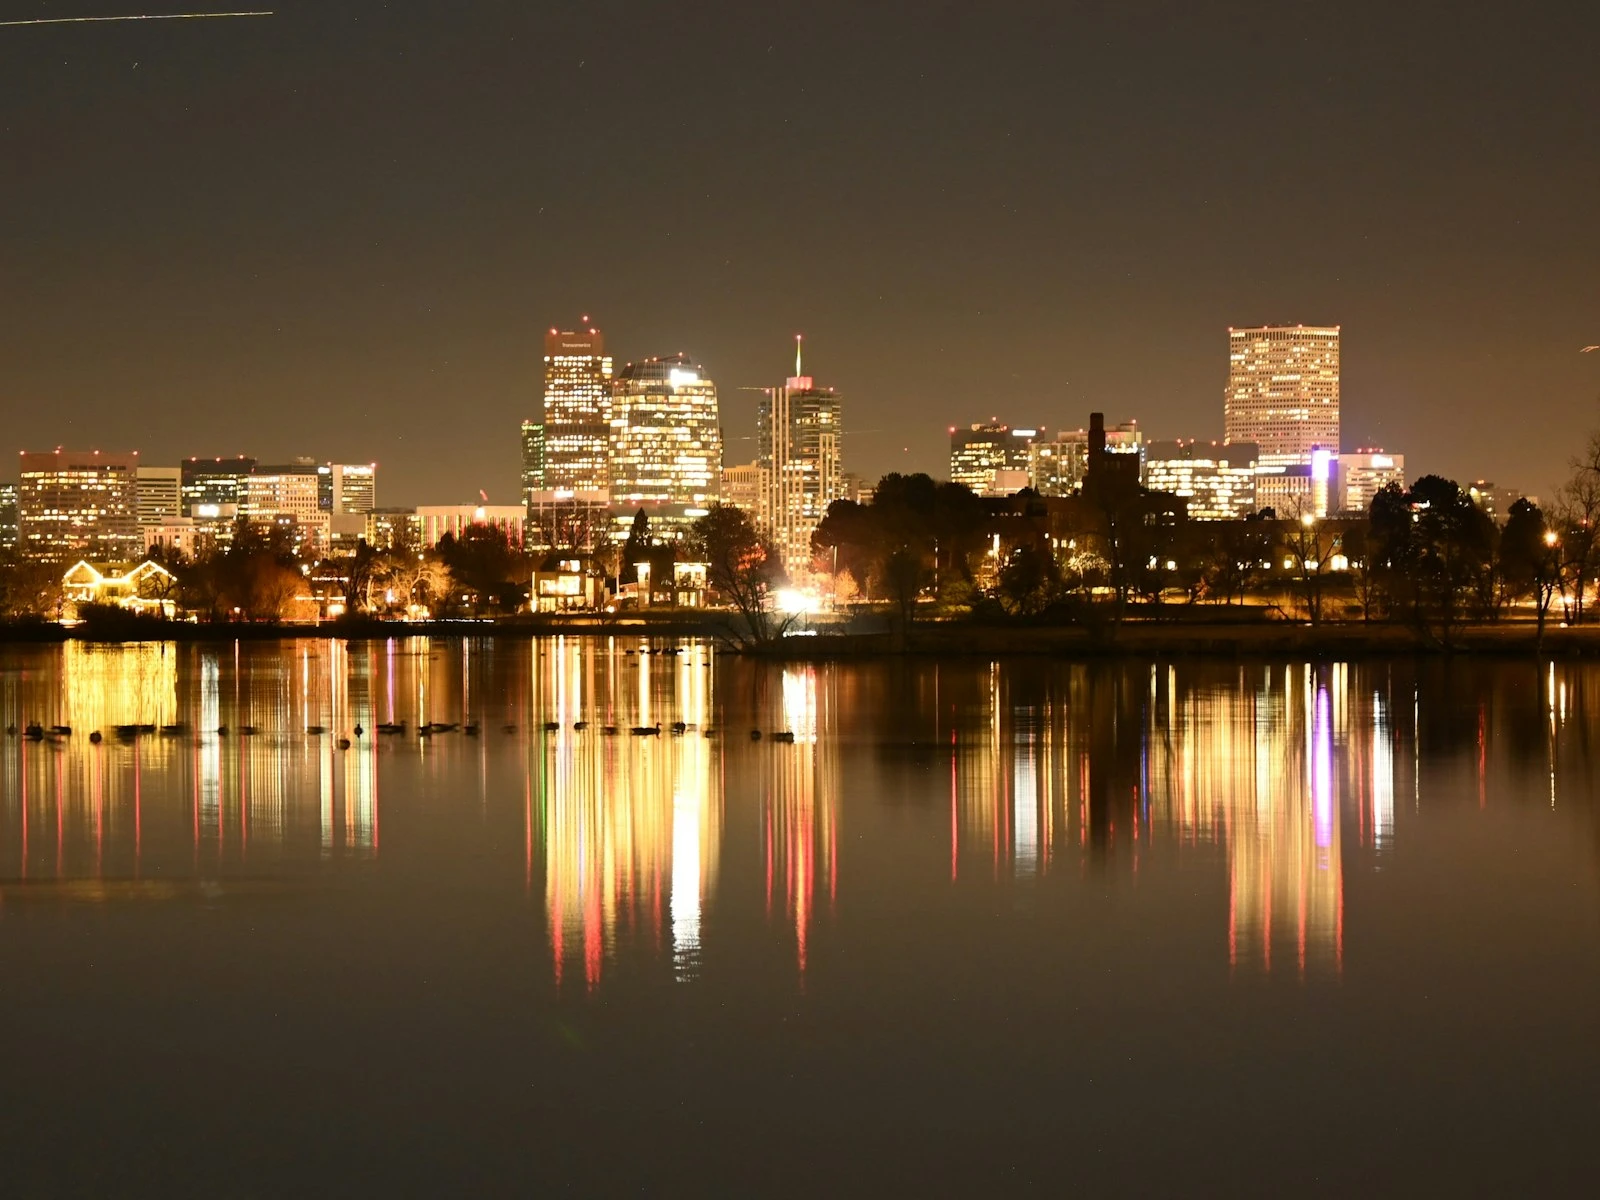
Skylines
The classic city light photograph. A panoramic view of a city's profile against the night sky.
Best practices:
- Find elevated vantage points for overview
- Include waterfront reflection when available
- Blue hour provides the most balanced exposures
- Shoot through transition from blue hour to full night for different moods
Bridges
Bridges combine architectural interest, light trails, and often water reflections.
Approaches:
- From the bridge (looking along its length)
- From the shore (showing the bridge in context)
- Underneath (interesting perspective, dramatic lighting)
- Across water (reflection opportunities)
Streets and Neighborhoods
Ground-level street photography at night captures urban life rather than urban landscape.
Considerations:
- Tripod use may be impractical or unwelcome in busy areas
- Higher ISO for handheld work
- Focus on lit areas and their relationship to darkness
- Include people for life and scale
Landmarks and Monuments
Famous buildings and monuments often have designed lighting worth capturing.
Tips:
- Lighting schedules may vary (some turn off at midnight)
- Popular viewpoints will have tripod competition
- Consider unusual angles or compositions beyond the iconic shot
- Blue hour often better than pure night for context
Technical Challenges in City Night Photography
Dynamic Range Extremes
Bright lights and dark shadows in the same frame exceed your camera's ability to capture everything.
Solutions:
- Expose for highlights, accept dark shadows
- Bracket exposures for HDR blending
- Shoot during blue hour for reduced contrast
- Use graduated filters (physical or digital)
Unwanted Light Sources
Street lights directly in frame, lens flare from out-of-frame lights, reflections from windows.
Solutions:
- Change position to hide problematic lights behind objects
- Use a lens hood to block off-axis light
- Clone out flare spots in post
- Sometimes embrace flare as aesthetic element
Crowds and Competing Photographers
Popular viewpoints get crowded, especially during good conditions.
Solutions:
- Arrive early to claim position
- Scout alternative viewpoints
- Shoot during less popular times
- Be courteous about tripod placement
Security and Access
Some locations restrict tripod use, have time-limited access, or require permits.
Solutions:
- Research restrictions before arriving
- Ask permission when appropriate
- Have backup locations in mind
- Respect rules even when inconvenient
Post-Processing City Light Images
RAW Advantage
Night images benefit enormously from RAW capture:
- Recover shadow detail without quality loss
- Adjust white balance for different moods
- Handle extreme highlight/shadow contrast
Common Adjustments
Highlight recovery: Pull back blown highlights in bright lights and windows Shadow lift: Reveal detail in dark areas (carefully, since noise lives in shadows) Clarity and dehaze: Add definition to buildings and structures White balance: Warm for nostalgic feel, cool for modern feel, or balance mixed sources Noise reduction: Even at low ISO, long exposures may show noise
Selective Editing
Different parts of night images often need different treatment:
- Shadows may need noise reduction
- Highlights may need recovery
- Sky may need separate treatment from buildings
- Colored lights may need saturation adjustment
Key Takeaways
- Shoot during blue hour (20-40 minutes after sunset) when the sky still has color and balances naturally with artificial city lights.
- Use a tripod with base ISO (100), f/8-f/11, and long exposures (10-30 seconds) for sharp, detailed cityscapes with minimal noise.
- Use f/14-f/16 for starburst effects on point light sources like street lamps and building lights.
- Scout locations during daylight to understand the layout, then return at blue hour with your composition already planned.
More in This Guide
Continue building your low-light photography skills.