You looked at the photo on your camera screen and it seemed fine. You loaded it on your computer and your subject is a smudged mess.
This happens to every photographer. It's one of the most common photography frustrations out there. And it keeps happening until you figure out why.
The frustrating truth is that "blurry" is not one problem. It is four different problems that all look similar but have completely different fixes. Until you diagnose which one you are dealing with, you will keep trying solutions that cannot possibly work.
This guide helps you figure out exactly what is going wrong with your photos and points you to the specific fix.
Why "Just Use a Faster Shutter Speed" Is Bad Advice
That is the generic tip everyone gives for blurry photos. And it works maybe 40% of the time.
The other 60% of the time, you are chasing the wrong problem entirely.
A faster shutter speed fixes blur caused by movement. But if your subject is blurry because your camera focused on the wrong thing, shutter speed changes nothing. If only part of your image is soft because your depth of field was too shallow, shutter speed will not help there either.
Telling someone with a focus problem to increase shutter speed is like telling someone with a flat tire to change their oil. The advice sounds reasonable until you realize the problems have nothing to do with each other.
So before you touch any settings, you need to diagnose what is actually happening.
The Four Types of Blur (And How to Tell Them Apart)
Look at your blurry photo carefully. The blur itself contains clues about what went wrong.
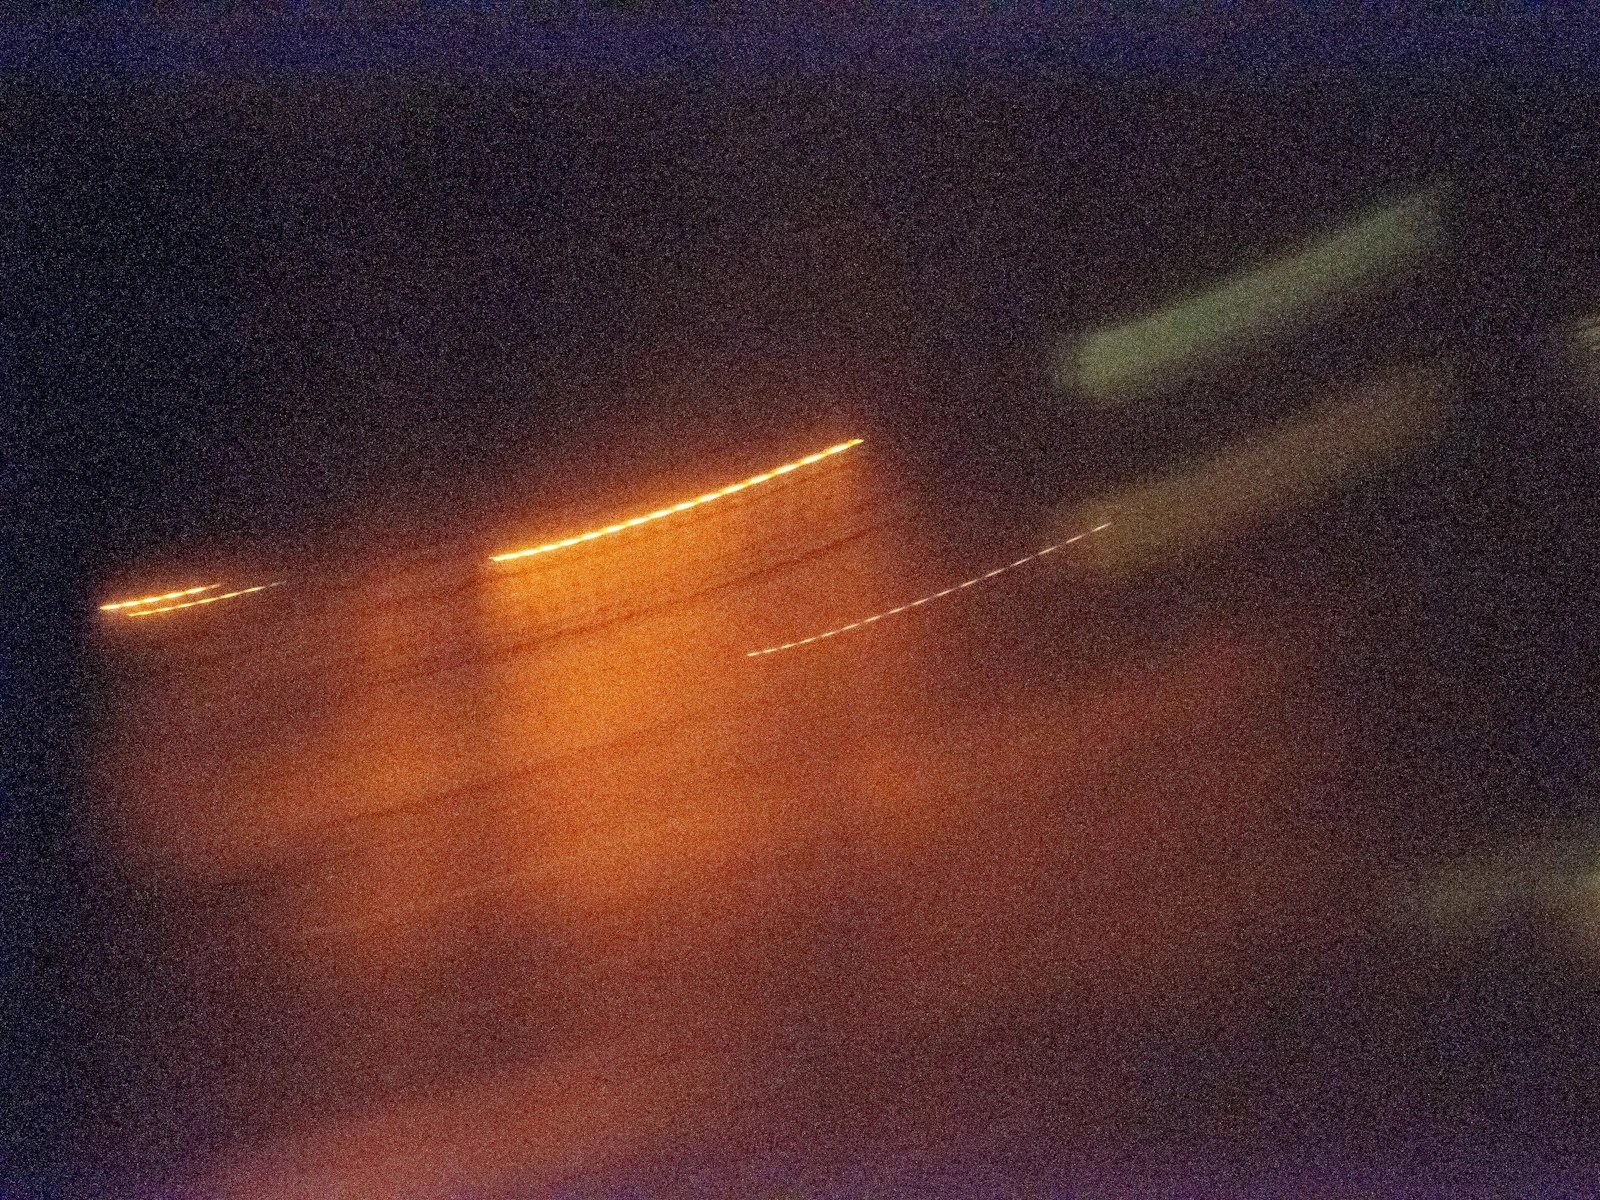
Type 1: Camera Shake
What it looks like: The entire image is equally soft. If there are any bright points of light in the frame, they look like tiny streaks or smears rather than points. Everything has a subtle directional blur in the same direction.
What causes it: Your hands moved while the shutter was open. The camera recorded that tiny movement as blur across the whole image.
The test: Look at something stationary in the frame, like a building, a sign, or a tree trunk. Is it sharp? If nothing in your image is sharp, and bright lights look streaky, you had camera shake.
The fix: You need a faster shutter speed, better stabilization, or more stable camera support. The general rule is your shutter speed for handheld shooting should be at least 1 over your focal length. Using a 50mm lens? Stay at 1/50 second or faster. Using a 200mm lens? You need 1/200 or faster. If you are not sure whether your blur is from camera shake or something else, learning the difference between camera shake and motion blur helps you diagnose what went wrong.
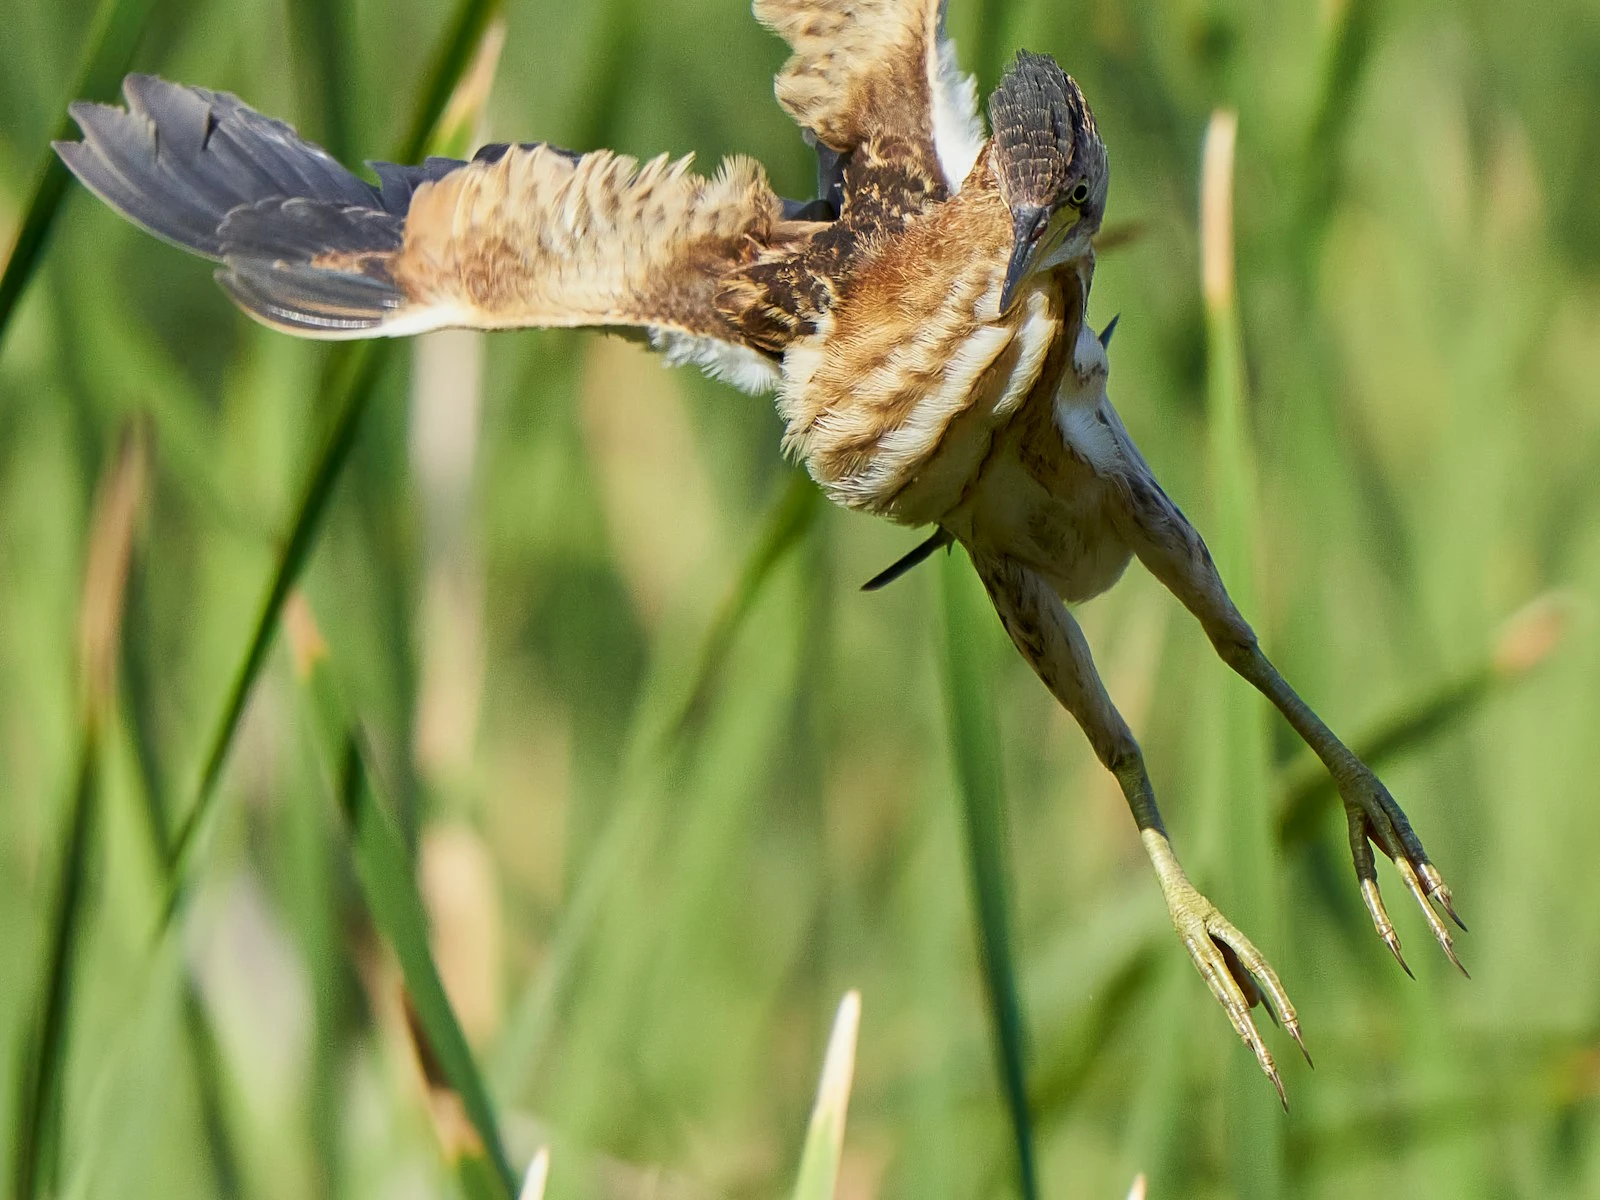
Type 2: Motion Blur
What it looks like: Your subject is blurry, but stationary things in the frame are sharp. The blur follows the direction your subject was moving. A person walking might have sharp legs (briefly stationary) but a blurred torso (mid-stride).
What causes it: Your subject moved while the shutter was open. Your camera was stable, but your subject was not.
The test: Find something that was not moving in your shot, like a bench, the background, or a parked car. Is that sharp while your subject is blurry? That is motion blur.
The fix: Faster shutter speed, but how fast depends on your subject. A person walking needs about 1/250. Kids running need 1/500 or faster. Athletes and birds can need 1/1000 or more. Since the fix overlaps with camera shake, understanding how to tell the two apart ensures you are solving the right problem.
Type 3: Missed Focus
What it looks like: Part of your image is perfectly sharp, just not the part you wanted. Your subject's nose is sharp but their eyes are soft. The person behind your subject is in focus but your subject is blurry. Or nothing at all appears to be in focus.
What causes it: Your camera's autofocus locked onto the wrong thing, or your subject moved between when you focused and when you took the shot.
The test: Zoom in and hunt around the image. Is anything sharp? If something else in the frame is tack sharp while your intended subject is soft, you missed focus. If your subject's ear is sharp but their eye is soft, same thing.
The fix: This is about focus technique, not camera settings. You need better control over where your camera focuses and when. Understanding why your subject is out of focus even when you thought you nailed it is the first step. From there, learning which autofocus mode to use and choosing the right focus area gives you precise control over what ends up sharp.
Type 4: Depth of Field Too Shallow
What it looks like: Your point of focus is sharp, but everything in front of it and behind it falls off to blur very quickly. You focused on someone's eye, but their ears and nose are soft. You shot a group, and the front row is sharp but the back row is blurry.
What causes it: Your aperture was too wide for the depth you needed. Wide apertures like f/1.8 or f/2.8 create a very thin plane of focus.
The test: Is the exact thing you focused on actually sharp? Zoom in tight. If the precise focus point is sharp but nearby objects at different distances are soft, your depth of field was too shallow.
The fix: Use a narrower aperture (higher f-number) to increase depth of field. For groups, f/5.6 is usually minimum. For landscapes with foreground interest, f/8 to f/11 is common. Getting both subject and background in focus at the same time takes a bit more technique, but the principle is straightforward.
The Quick Diagnostic Flowchart
Run through these questions in order:
Question 1: Is ANYTHING in your photo sharp?
- No, everything is soft → You have camera shake. Fix: faster shutter speed or stabilization.
- Yes, something is sharp → Continue to Question 2.
Question 2: Is the sharp part your intended subject?
- No, something else is sharp → You missed focus. Fix: better focus technique and point selection.
- Yes, but only part of them → Continue to Question 3.
Question 3: Is the sharp part exactly where you focused?
- Yes, but nearby areas are blurry → Your depth of field was too shallow. Fix: narrower aperture.
- No, the blur follows a direction → Your subject moved. Fix: faster shutter speed.
Run through that sequence and you will know which problem you are solving before you try any fixes.
When Blur Problems Combine
Sometimes you have more than one issue in the same photo. This is common in low light, where you are balancing multiple compromises.
You can still diagnose them separately, though.
A photo with camera shake AND shallow depth of field will show the depth of field problem in the focused area (which will be slightly streaky from shake) and obvious shake in everything else.
A photo with motion blur AND missed focus will have motion blur on a subject that was also in the wrong focal plane.
Diagnose each issue independently, then address them in order of severity. Usually fixing the biggest problem reveals whether the others were actually noticeable.
Your Camera Is Working Against You (Sometimes)
Most tutorials skip the fact that your camera's autofocus system has opinions about where to focus, and those opinions often differ from yours.
Modern cameras try to be helpful by automatically finding faces, tracking subjects, and choosing focus points for you. This works great when the camera guesses right. When it guesses wrong, you get technically competent photos of the wrong thing in focus.
Learning to override these automatic choices is the difference between hoping for sharp photos and knowing you will get them. Choosing between continuous and single autofocus based on your subject's movement is the first step. Back button focus takes it further by separating the focus and shutter actions entirely, giving you full control over when the camera locks on.
Low Light Makes Everything Harder
All four blur problems get worse when light is limited.
Camera shake increases because you need slower shutter speeds to gather enough light. Motion blur increases for the same reason. Missed focus happens more because autofocus systems struggle to lock on in darkness. And you might open your aperture wider for more light, reducing depth of field as a side effect.
If your blur problems mainly happen indoors or at night, low light is amplifying whatever underlying issue exists. Focusing in the dark requires different techniques because your autofocus system needs contrast to work, and darkness robs it of exactly that.