Sometimes you need everything sharp, and you are not going for the creamy background blur of a portrait or artistic selective focus. You need the rocks at your feet and the mountains on the horizon both tack sharp. You need the couple in the foreground and the cathedral behind them equally crisp. You need every corner of that real estate interior detailed enough for buyers to zoom in.
This is maximizing depth of field, and it requires a different approach than most photography. Instead of isolating your subject, you're including everything. Instead of narrowing attention, you're inviting exploration.
It sounds simple enough to just use a small aperture, but there's more to it. Stop down too far and diffraction softens your image. Focus in the wrong spot and either foreground or background goes soft despite your aperture choice. And sometimes, no single aperture can get everything sharp, no matter how narrow you go.
This guide covers the techniques for getting everything in focus, including when you need it, the factors that control it, and what to do when basic techniques aren't enough. It's one of the more advanced topics in our sharp photos guide.
When You Want Everything Sharp
Maximizing depth of field isn't always the goal, since shallow focus has its place. But certain situations genuinely call for front-to-back sharpness.
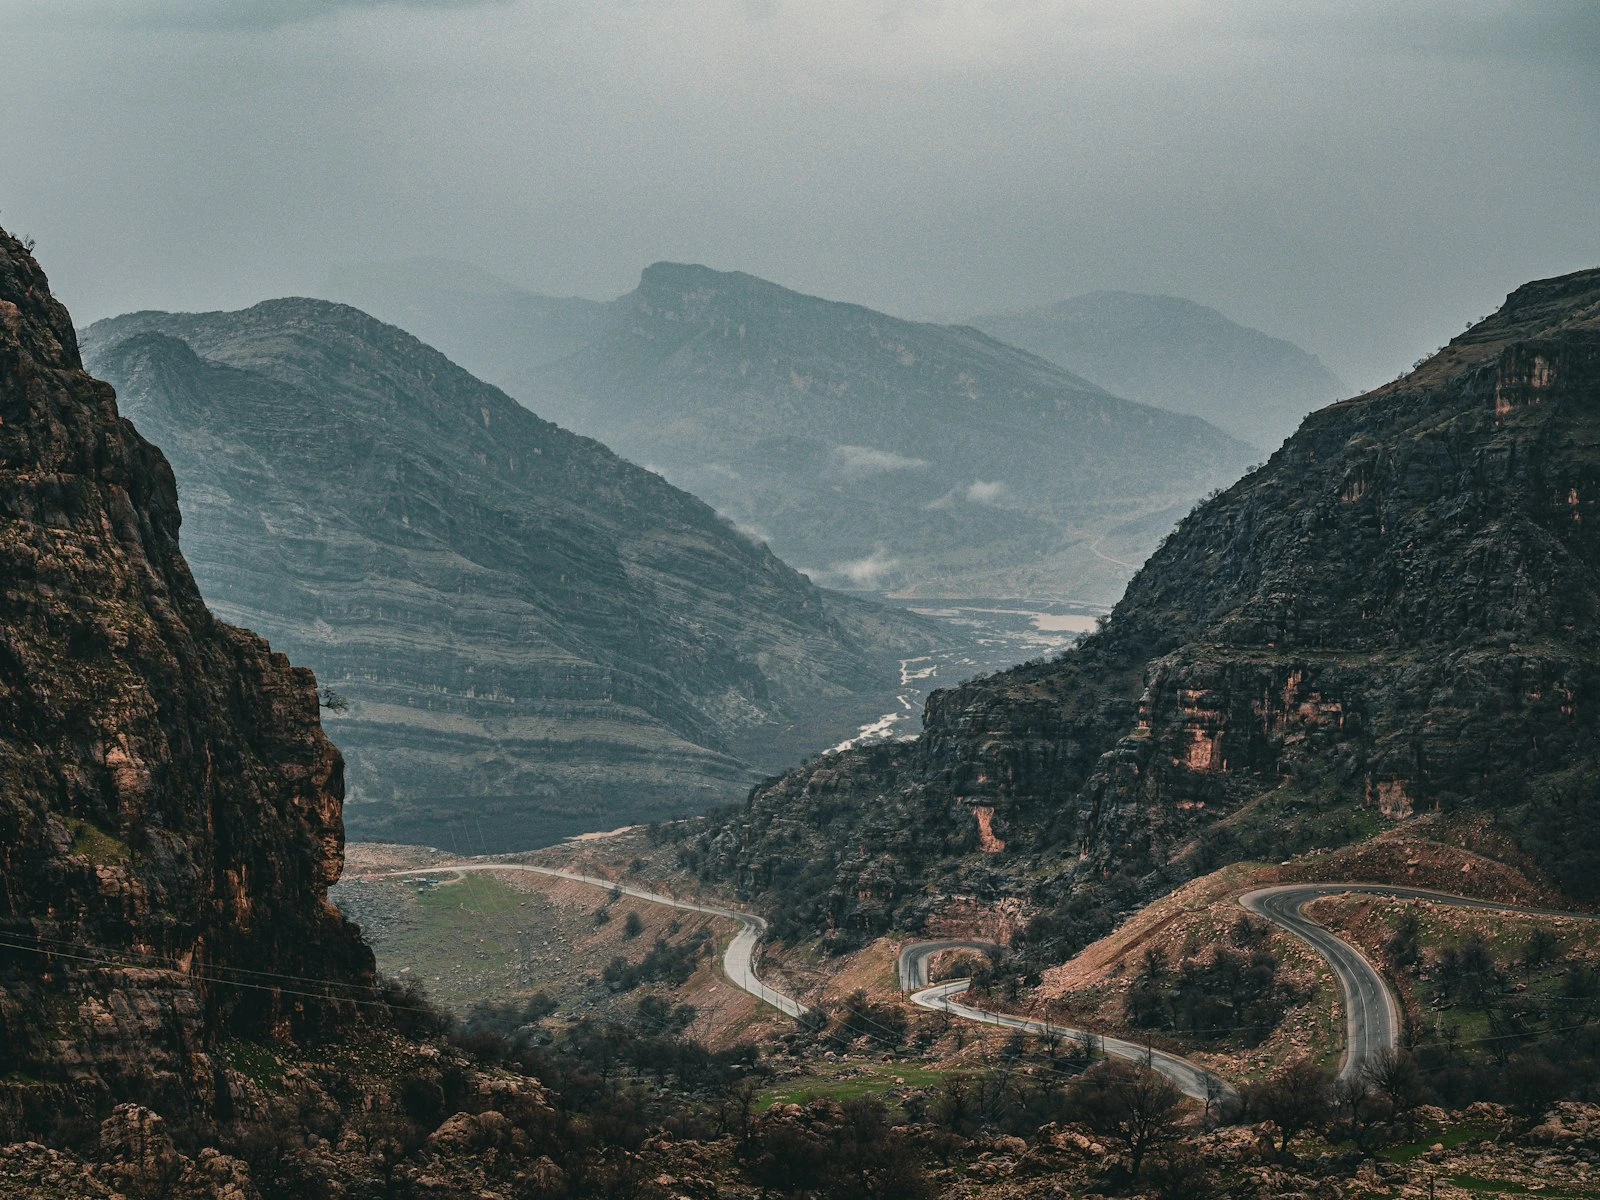
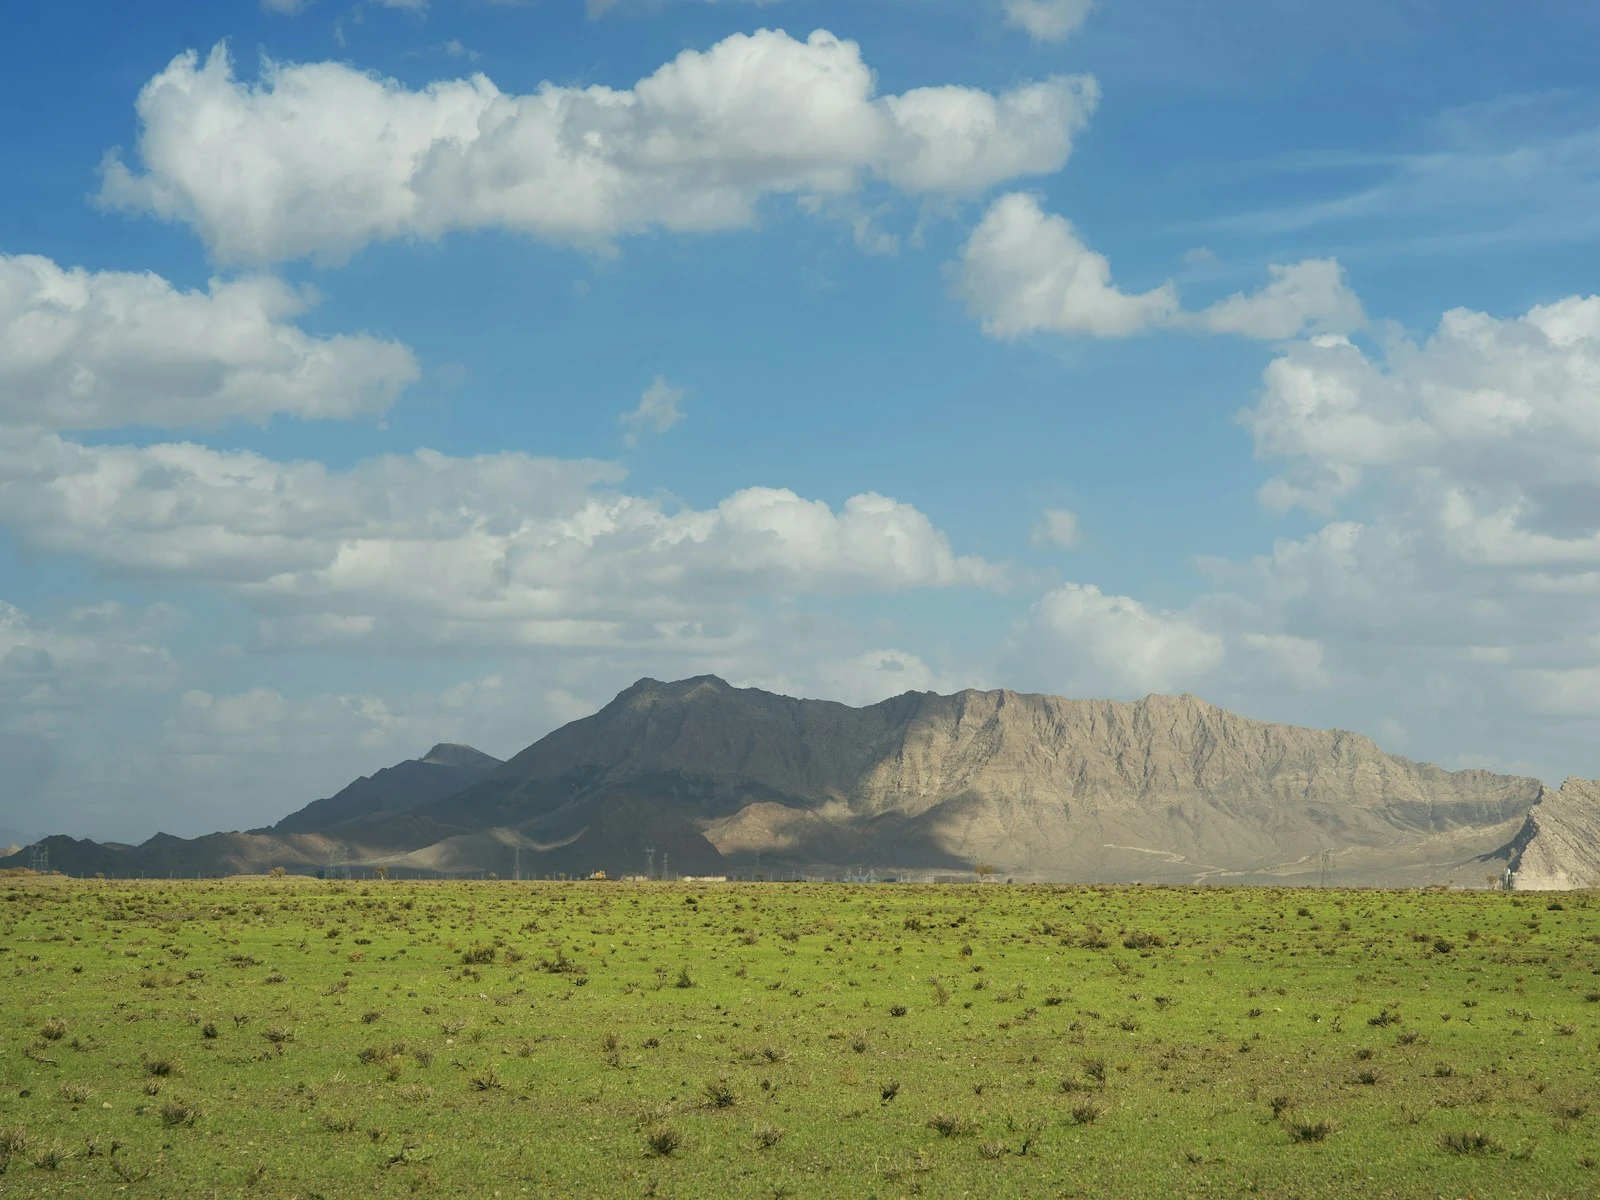
Landscape photography is the classic case. You've found a composition with interesting foreground elements like rocks, wildflowers, and a leading line, along with a compelling background. The whole scene tells the story. If the foreground goes soft, the image loses its anchor. If the background goes soft, you lose the payoff.
Environmental portraits balance subject and setting. A craftsperson in their workshop. A chef in their kitchen. A musician surrounded by instruments. The environment matters as much as the person. Shallow focus would eliminate half the story.
Real estate and architecture demand sharpness throughout. Buyers want to see every detail. Soft corners or blurry backgrounds suggest something's being hidden. Technical quality signals professionalism.
Product photography with context often needs everything sharp. The shoe on the trail. The tent in the campsite. The watch on the wrist with the city behind. Shallow focus would work for isolated product shots, but contextual shots need depth.
Travel photography where you're documenting a place rather than isolating a subject. Street scenes, markets, plazas, photos meant to show what it felt like to be there.
If your image has important elements at multiple distances and you want them all sharp, read on.
The Aperture Factor: Stopping Down
Aperture is your primary control for depth of field, and making it smaller (higher f-numbers) is the most direct way to get more of your scene in focus.
At f/2.8, you might have a few inches of acceptable sharpness. At f/8, that might expand to several feet. At f/11, you're getting into territory where foreground and background can both be sharp if you focus correctly.
The practical range for maximum sharpness is f/8 to f/11. This is where most lenses deliver their best optical performance while providing significant depth of field. These apertures balance sharpness across the frame with sufficient depth to cover most scenes.
Narrower than f/11, you start fighting diffraction, but we'll cover that limitation shortly.
What to expect at common apertures:
- f/5.6: Moderate depth. Good for scenes where elements aren't drastically different distances.
- f/8: The classic sharpness sweet spot. Deep enough for many landscape situations.
- f/11: Maximum practical depth for most cameras. Your go-to for foreground-to-background sharpness.
- f/16: More depth than f/11, but diffraction starts affecting overall sharpness on most cameras.
The right aperture depends on how much depth you actually need. Don't default to f/16 when f/8 would cover your scene, because you'll sacrifice peak sharpness for depth you didn't need.
The Distance Factor: Farther Equals More
Your distance from the nearest subject dramatically affects depth of field. Get close to something, and depth of field shrinks. Step back, and it expands, even at the same aperture.
This is why macro photography is so challenging. At inches away, even f/16 might give you millimeters of sharp depth. But photograph a landscape where nothing is closer than 20 feet, and f/8 might render everything to infinity sharp.
Practical application: If you're struggling to get both foreground and background sharp, check whether you can step back. Sometimes moving two feet farther from your foreground element solves the problem without changing any settings.
The tradeoff is that stepping back changes your composition. Your foreground element becomes smaller in the frame. You have to decide whether the current composition is worth the sharpness compromise, or whether you can find a composition that works from farther away.
The Focal Length Factor: Wider Equals More
Wider focal lengths give more depth of field at the same aperture and subject distance. A 24mm lens at f/8 provides significantly more depth than an 85mm lens at f/8.
This is one reason landscape photographers favor wide angles. Beyond the compositional appeal of including more scene, wide lenses make achieving front-to-back sharpness easier.
Approximate depth of field comparison at f/8, focused at 10 feet:
- 24mm: Roughly 5 feet to infinity sharp
- 50mm: Roughly 7 feet to 18 feet sharp
- 85mm: Roughly 9 feet to 12 feet sharp
These are approximations, and actual depth depends on your sensor size and acceptable sharpness standards, but the pattern is clear. Wider lenses dramatically increase your working depth.
Practical application: If you need maximum depth of field and can use a wider lens without ruining your composition, the wider choice makes your job easier. This doesn't mean cramming a 16mm lens into every situation, but it does mean considering focal length as part of your depth of field strategy.
Hyperfocal Distance Simplified
Here's a concept that sounds complicated but solves a real problem. Where should you focus to maximize sharpness from foreground to background?
Your intuition might say "focus on the horizon" or "focus on infinity." But that wastes half your depth of field. When you focus at infinity, everything behind your focus point is wasted sharpness because there's nothing there. The sharpness that extends beyond infinity could have been used in front of your focus point.
Hyperfocal distance is the closest focus distance where infinity is still acceptably sharp. Focus at this point, and everything from half that distance to infinity falls within your depth of field.
Example: At 24mm and f/11 on a full-frame camera, the hyperfocal distance is roughly 7 feet. Focus there, and everything from about 3.5 feet to infinity is sharp. That's foreground rocks at your feet and mountains on the horizon, all in focus.
How to find hyperfocal distance:
The easy way: Plug your lens, aperture, and distance into a depth of field tool and it tells you exactly where to focus and how much will be sharp.
The field estimate: For wide-angle landscape work, focus roughly one-third into your scene. This isn't precisely hyperfocal, but it distributes depth of field reasonably well in most situations.
The practical approach: If you're not sure exactly where hyperfocal is, focus on something in the middle distance, not infinity, not the closest element, and check your results. Most situations are more forgiving than the math suggests.
Don't focus on the horizon when you have foreground elements. You're leaving sharpness on the table that should be covering your foreground.
Focus Stacking: When Aperture Isn't Enough
Sometimes no single aperture can get everything sharp. The foreground element is too close, the background too far, and even f/16 can't bridge the gap.
This is where focus stacking comes in.
The idea is to take multiple photos of the same scene, each focused at a different distance, then combine them in post-processing, using the sharp portions of each frame to create a final image that's sharp throughout.
Basic workflow:
- Mount your camera on a tripod. The frames must align precisely.
- Set your aperture. Usually f/8 to f/11. You want good sharpness per frame, not maximum depth per frame.
- Take your first shot focused on the nearest element.
- Refocus slightly farther and take another shot.
- Continue until you've covered the entire depth of your scene.
- Combine the frames in software. Photoshop, Helicon Focus, Zerene Stacker, and other programs can blend focus-stacked images automatically.
How many frames do you need? Depends on the depth gap. For landscapes with moderate foreground-to-background distance, 3-5 frames often suffice. For macro work where you're inches from your subject, you might need 20-30 frames to cover a few inches of depth.
When to use focus stacking:
- Macro photography where depth of field is inherently razor-thin
- Landscapes with very close foreground elements (inches away) and distant backgrounds
- Any situation where even f/16 leaves critical elements soft
- When you want maximum sharpness (f/8) throughout a deep scene instead of diffraction-limited f/16 sharpness
Focus stacking takes practice and adds post-processing time, but it solves problems that no in-camera technique can address.
The Diffraction Limit: When Too Narrow Hurts
There's a catch to stopping down for more depth of field, and that catch is diffraction.
When light passes through a very small aperture, it bends around the edges of the aperture blades. This bending spreads the light slightly, softening the image. The smaller the aperture, the more pronounced this effect.
On most cameras, diffraction becomes visible around f/16. By f/22, the softening is significant enough that you're losing more sharpness to diffraction than you're gaining from increased depth of field.
This creates a practical ceiling. You can't just crank aperture to f/32 and expect everything to be razor sharp. Past a certain point, you're making everything softer.
The diffraction-limited aperture varies by sensor:
- Full-frame cameras: Diffraction typically visible around f/16, significant by f/22
- APS-C cameras: Diffraction visible around f/11, significant by f/16
- Micro Four Thirds: Diffraction visible around f/8, significant by f/11
This is why f/8 to f/11 is the practical sweet spot for most cameras. You get substantial depth of field while staying below the diffraction threshold.
If f/11 doesn't give you enough depth and you can't step back or use a wider lens, focus stacking is your answer, not f/22.
Practical Workflows for Different Scenarios
Let me walk through specific situations and the approaches that work.
Standard Landscape with Foreground Interest
You're photographing a mountain scene with interesting rocks in the foreground, maybe 6-8 feet away. The mountains are miles distant.
Workflow:
- Set aperture to f/11
- Calculate or estimate hyperfocal distance (or use a smartphone app)
- Focus at that distance, not on the rocks, not on the mountains
- Use a tripod since f/11 may require slower shutter speeds
- Check your shot by zooming in on both foreground and background
For most wide-angle landscape situations, this single-shot approach at hyperfocal distance works perfectly.
Close Foreground Element
Your foreground subject is very close, wildflowers 2-3 feet away, with a mountain backdrop.
Workflow:
- Try f/11 first, focused between the flowers and infinity
- Check the result. Are both sharp enough?
- If not, consider focus stacking: one frame focused on the flowers, one on the middle distance, one on the mountains
- Blend in post-processing
Very close foreground elements often push beyond what single-shot technique can achieve. Be ready to stack.
Environmental Portrait
A person in a meaningful location: their workshop, their kitchen, a significant setting. You want them sharp and the environment sharp.
Workflow:
- Position your subject at a distance where moderate aperture provides enough depth
- Use f/8 to f/11
- Focus on your subject's eyes, since they're the priority
- Verify the background is acceptably sharp
If your subject is too close for the background to stay sharp at f/11, ask them to step back. The depth of field math favors distance, and moving your subject a few feet can solve the problem.
Real Estate Interior
Every corner of the room needs to be sharp. Buyers will examine details.
Workflow:
- Use a wide-angle lens (16-24mm range is common)
- Set aperture to f/8 or f/11
- Focus roughly one-third into the room
- Use a tripod, since interior lighting often requires slower shutter speeds
- Verify corners and far walls are sharp
Wide angles combined with moderate apertures make real estate interiors straightforward. The focal length does most of the heavy lifting.
Key Takeaways
- Use f/8 to f/11 for best lens sharpness with deep depth of field, and avoid f/16+ where diffraction softens the image more than the extra depth helps.
- Focus one-third into the scene (not on the foreground, not on infinity) to distribute depth of field across the entire composition.
- Use focus stacking (multiple shots at different focus distances, blended in software) when close foreground and distant background exceed single-shot depth of field.
- A wider-angle lens provides more depth of field at the same aperture, so switch to a shorter focal length if you are struggling to get everything sharp.
More in This Guide
Continue building your sharpness and focus skills.