There's a debate in photography circles that never quite dies: should you shoot in manual mode or aperture priority? One camp says manual is the only way to truly understand exposure. The other says aperture priority is faster and smarter. Both camps are partially right, and both are missing the point.
The real answer is that these are different tools for different situations. Using manual mode everywhere is like using a screwdriver to hammer nails. Using aperture priority everywhere is like never learning to use a screwdriver at all.
Let me walk through when each mode actually makes sense, so you can stop worrying about which is "better" and start choosing the right one for the moment. This is one of the most practical decisions in our camera settings guide.
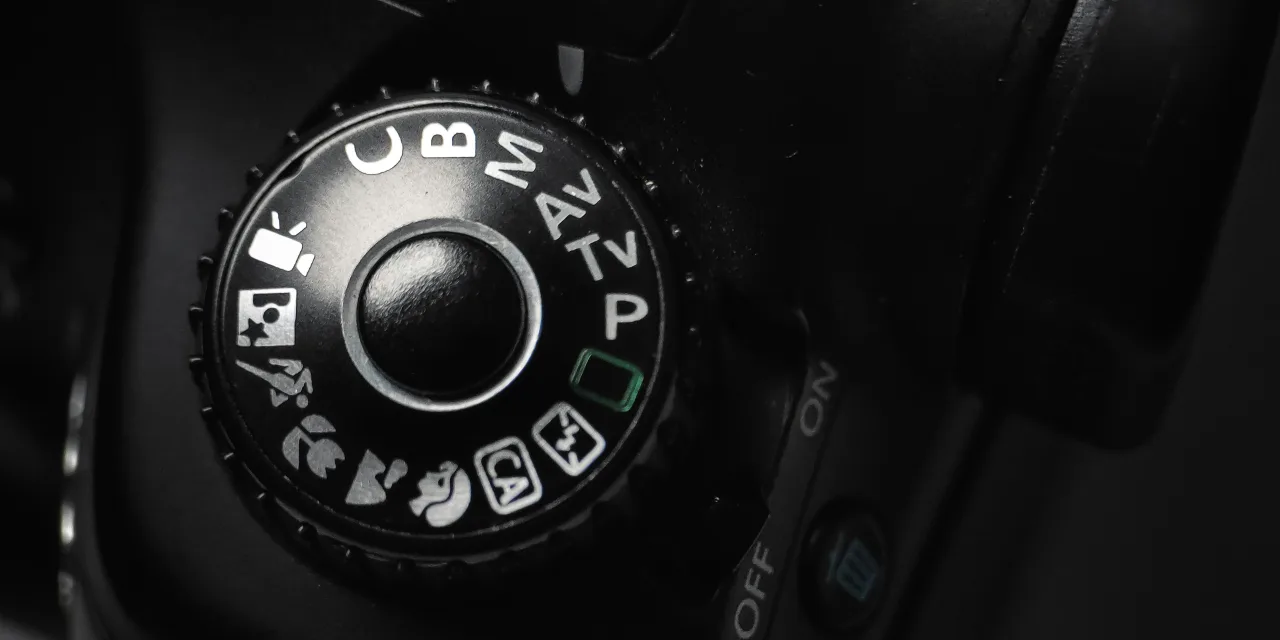
What Each Mode Actually Does
Before comparing them, let's be clear about the mechanics.
Manual mode (M): You set the aperture, shutter speed, and ISO. The camera does nothing automatically. You're in complete control, and you're completely responsible for getting the exposure right.
Aperture priority (A or Av): You set the aperture and ISO (or let Auto ISO handle it). The camera automatically picks the shutter speed to achieve correct exposure based on its light meter reading. You control depth of field; the camera handles the math.
That's really it. The difference is whether you're choosing one variable or all three.
When Aperture Priority Is the Better Choice
Aperture priority isn't a "beginner mode." It's an efficiency mode. Professional photographers use it constantly because it lets them focus on composition and timing instead of exposure math.
Changing Light Conditions
Walking through a city, moving between shade and sun, stepping from outdoors to indoors. The light is changing every few seconds. In manual mode, you'd be adjusting shutter speed constantly. In aperture priority, the camera tracks the light changes for you while you concentrate on what matters: finding photos.
Example: Street photography. You're walking down a market street. Bright sun, then a covered stall, then back into sun, then into a shadowed alley. In aperture priority at f/5.6, your camera seamlessly adjusts from 1/2000 in the sun to 1/250 in the shade. In manual mode, you'd be chimping (checking your screen) and adjusting dials between every shot.
Events and Social Situations
Weddings, parties, family gatherings. The light changes as you move between rooms, and moments happen fast. Missing a candid shot because you were adjusting your shutter speed is a real problem.
Set your aperture for the depth of field you want (f/2.8 for subject isolation, f/4-5.6 for small groups), pair it with Auto ISO, and let the camera handle the rest. Your job is to be ready when something happens.
When Speed Matters More Than Precision
Sometimes getting a correctly exposed photo quickly is more important than getting a perfectly exposed photo slowly. Photojournalism, travel photography, any situation where the moment won't wait for you to dial in settings.
Aperture priority with Auto ISO is essentially a "smart auto" mode where you still control the one creative variable that matters most (depth of field) while the camera handles the technical variables.
When Manual Mode Is the Better Choice
Manual mode exists for situations where the camera's automatic metering gets fooled, or where you need absolute consistency.
Controlled Lighting
Studio work with strobes or continuous lights. The light isn't changing. You set it up, you meter it, you dial in your settings, and then you shoot hundreds of frames without touching the dials. Aperture priority would hunt for exposure unnecessarily in a situation where nothing is changing.
The same applies to any controlled environment: product photography with fixed lighting, portraits with a consistent setup, or any scenario where you've deliberately created your lighting.
Tricky Metering Situations
Your camera's light meter is smart, but it can be fooled. Scenes with lots of white (snow, white walls, wedding dresses) get underexposed because the camera tries to make everything medium gray. Scenes with lots of black get overexposed for the same reason.
In aperture priority, you'd need to use exposure compensation constantly to correct these errors. In manual mode, you meter once, dial in the correct exposure, and it stays there regardless of what's in the frame.
Example: Photographing a performer on a dark stage with a spotlight. The camera's meter sees mostly darkness and wants to brighten everything, blowing out the performer. In manual mode, you expose for the spotlight and ignore the darkness. Consistent, correct results every frame.
Consistent Exposure Across a Series
When you need a batch of photos with identical exposure, like real estate interiors, product catalogs, or panoramic stitching, manual mode ensures every frame matches.
In aperture priority, slight changes in composition (pointing the camera slightly higher toward a bright window, then back down) would cause the exposure to shift between frames. Manual eliminates this problem entirely.
Long Exposures and Creative Work
When you're doing long exposure photography (light trails, silky water, star photography), you're deliberately choosing a specific shutter speed for creative effect. That's manual mode territory by definition. You need control over that shutter speed, not the camera's opinion about what it should be.
Learning the Exposure Triangle
If you're still building your understanding of how aperture, shutter speed, and ISO relate to each other, spending time in manual mode is genuinely valuable. It forces you to understand the tradeoffs because the camera won't bail you out.
But this is a learning exercise, not a permanent lifestyle. Once you understand the relationships, you can use any mode confidently because you know what the camera is doing behind the scenes.
The Modes Nobody Talks About
Shutter Priority (S or Tv)
You set the shutter speed; the camera picks the aperture. This is useful when freezing motion is your top priority and you don't care as much about depth of field.
When it makes sense: Sports, wildlife, kids running around. You need 1/1000 and you need it every frame. Let the camera figure out the aperture.
When it doesn't: Most other situations. Aperture priority gives you more creative control because depth of field is usually a more important creative choice than exact shutter speed.
Program Mode (P)
The camera picks both aperture and shutter speed. You can shift the combination (wider aperture with faster shutter, or narrower aperture with slower shutter) but the camera makes the initial choice.
I rarely use this, but it has a place. If you're handing your camera to someone who doesn't know how to use it, program mode is smarter than full auto without the complexity of choosing settings.
My Actual Workflow
Here's how I actually use these modes in practice, not in theory.
Default: Aperture priority with Auto ISO. This is my starting position for probably 70% of my photography. I set the aperture for my creative intent, set a minimum shutter speed in Auto ISO (usually 1/250 for people, 1/125 for still subjects), and shoot.
Switch to manual when: The light is constant and I want consistent exposure. Studio work, controlled setups, panoramas. Or when the scene is fooling the meter (backlighting, spotlights, snow).
Switch to shutter priority when: Motion is the primary concern and I'm less worried about depth of field. Fast sports, birds in flight.
The key insight: I'm not loyal to any mode. I switch based on the situation, sometimes mid-shoot. The best mode is whichever one lets you focus on making good photos instead of fighting your camera.
The Exposure Compensation Bridge
One thing that makes aperture priority much more powerful: exposure compensation. This lets you tell the camera "I want your automatic exposure, but brighter" or "but darker."
If the camera is consistently underexposing your scene in aperture priority, dial in +1 exposure compensation. Now it's still tracking light changes automatically, but biased toward your preferred brightness.
This is often faster than switching to manual mode for tricky scenes. You get the speed of automation with a manual override. If your shots are still coming out too dark or too bright after compensation, the issue is usually the metering mode, not the shooting mode.
Stop Feeling Guilty About Your Mode Dial
If you shoot in aperture priority most of the time, you're not a lesser photographer. If you shoot in manual most of the time, you're not wasting effort. The goal is making good photos, not impressing other photographers with your mode dial position.
The photographer who understands exposure well enough to use any mode confidently will always outperform the one who rigidly sticks to a single mode because someone told them it was "correct."
Learn both. Practice both. Use whichever one serves the photo you're trying to make right now.
Key Takeaways
- Use aperture priority with Auto ISO as your default for changing light conditions, events, and fast-moving situations where speed matters more than precision.
- Switch to manual mode when lighting is controlled (studio, product work) or when the camera's meter gets fooled by bright or dark backgrounds.
- Use exposure compensation in aperture priority to override meter errors without switching to full manual.
- Stop worrying about which mode is "correct" and start choosing based on what the specific situation demands.
More in This Guide
Build your understanding of camera settings with these related articles.