Professional headshots matter for LinkedIn, company directories, speaker bios, and any professional context where a good photo makes a real impression.
You don't necessarily need to hire a photographer. With the right setup and technique, your phone can produce headshots that look genuinely professional.
The key word is "setup." Phone headshots that look professional are carefully prepared and executed. This guide walks you through the complete process, and it's one of the most practical articles in our phone photography guide.
What Makes a Headshot Look Professional
Before diving into technique, understand what you're trying to achieve:
Clean, simple background. Nothing distracting, competing, or inappropriate for the context.
Good lighting. Soft, flattering light that doesn't create harsh shadows or washed-out areas.
Sharp focus on the eyes. The viewer's attention should go to the eyes first.
Appropriate framing. Head and shoulders typically, with room to breathe but not too much empty space. Good composition applies even in a simple headshot.
Natural expression. Approachable, confident, appropriate for the professional context.
Quality that holds up. The image should look good on LinkedIn, on a company website, and potentially printed.
A phone can achieve all of these, with proper setup.
Location and Background
The background sets the tone. Professional headshots typically have one of several background styles:
Simple Solid Background
A plain wall works well. Look for:
- Neutral colors (gray, white, light blue, tan)
- Even tone without visible texture, marks, or patterns
- Enough distance from the wall to allow some separation
How to find it: Look around your home or office. A clean section of wall, a pulled-down window shade, or even a large solid-colored backdrop (sheet, poster board) can work.
Blurred Environment
An office, bookshelf, or other professional environment blurred in the background suggests context while keeping attention on the face.
Requirements: Good separation between subject and background (6+ feet ideally), and lighting that works for both.
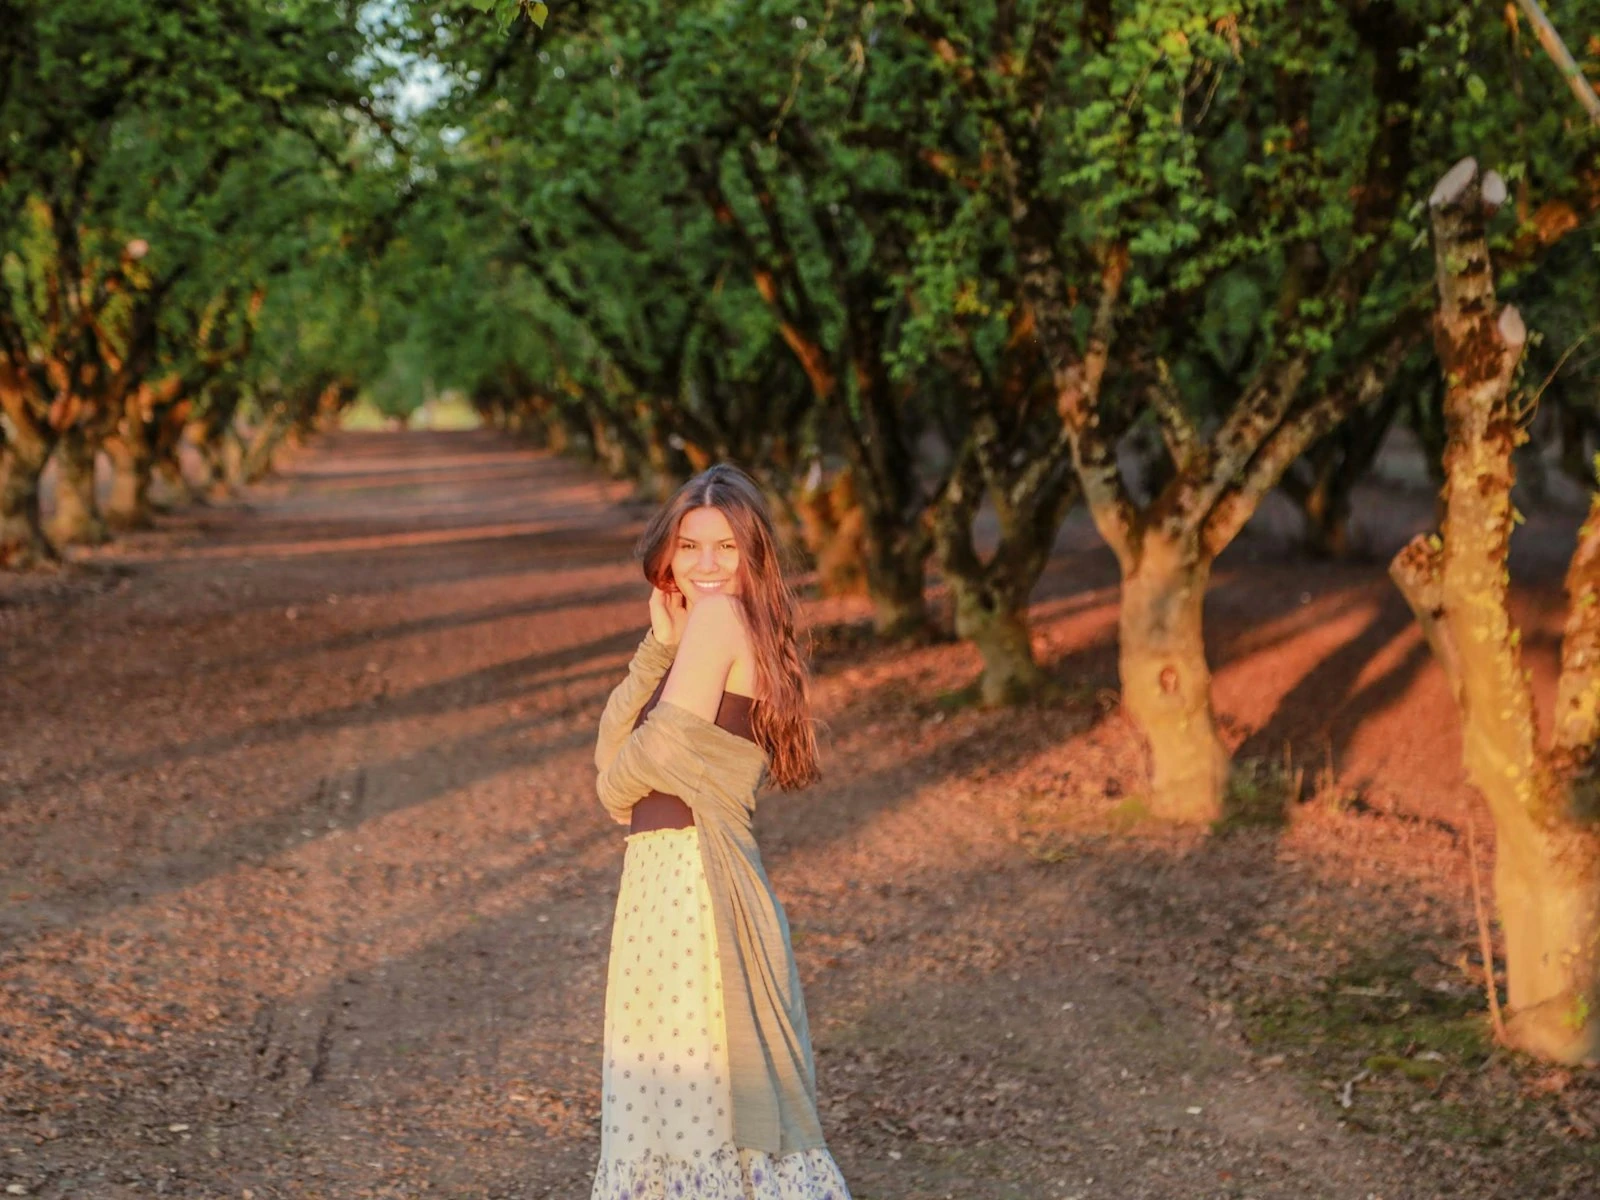
Outdoor Natural
Trees, foliage, or urban environments can work if the light is right and the background doesn't distract.
Challenges: Lighting control is harder. Background can be busy. Weather and timing dependencies.
Recommendation for your first attempt: Start with a simple solid background indoors. It's the most controllable and the easiest to get right.
Lighting Setup
Lighting makes or breaks headshots. Phone cameras can only work with the light you provide.
The Best Light: Large, Soft, Directional
Large source: A large window provides soft, flattering light. The bigger the light source relative to your subject, the softer the shadows.
Soft quality: Diffused light (like a north-facing window or a window with sheer curtains) wraps around the face without harsh shadows.
Directional: Light from one side creates depth and dimension. Flat front lighting can look institutional. Lighting fundamentals covers why direction matters so much for faces.
Window Light Setup (Recommended)
- Find a large window with soft light (not direct sun streaming in)
- Position yourself 3-4 feet from the window
- Turn so the window is at roughly 45 degrees to your face
- The lit side of your face should face the camera
- If shadows are too harsh, place a white foam board or sheet on the shadow side to bounce light back
Test: Take a quick shot. Check for harsh shadows under the nose and chin. Adjust position or add fill until shadows are soft.
Overcast Day Outdoor Option
An overcast sky acts as a giant softbox. Go outside near a white or neutral wall.
Position yourself so open sky lights your face (not with a building blocking the sky). The wall behind you provides a clean background.
Advantage: Very soft, forgiving light. Disadvantage: Less control over direction and intensity.
What to Avoid
Direct sun. Creates harsh shadows and squinting. Overhead indoor lighting. Creates shadows under eyes, nose, and chin. Mixed light sources. Different color temperatures create weird color casts. Backlighting. Your face will be dark unless HDR compensates (which may not look natural).
Camera Setup
Which Camera/Lens to Use
If you have a multi-lens phone:
Best choice: Main camera (1x) for best quality, or telephoto (2x, 3x) if you can stand far enough back. The iPhone features guide explains which lens to use when.
Why telephoto can be better: Longer focal lengths create less distortion and more flattering facial proportions. But you need enough space.
Avoid: Ultra-wide (0.5x) distorts faces unflatteringly.
Portrait Mode Considerations
Portrait Mode can work for headshots, but:
Advantages:
- Simulated background blur separates you from background
- Can look polished and professional
Risks:
- Edge detection can fail around hair, ears, or collar
- Glasses create problems
- Blur can look obviously fake on close inspection
Recommendation: Try both Portrait Mode and regular mode. Use whichever produces better results for your specific setup.
Camera Height and Distance
Height: Position the phone at or slightly above eye level. Too low creates unflattering angles (up the nose). Too high can look odd.
Distance: Fill the frame appropriately. Head and shoulders should occupy most of the frame without cramping.
For Portrait Mode: Stay within the recommended distance (usually 3-8 feet) for the effect to work properly.
Use a Stand or Tripod
Don't handheld headshots of yourself. A phone tripod, phone mount, or even propping your phone on stable objects gives you:
- Consistent framing
- Freedom to adjust your pose
- Ability to use the timer or remote trigger
- Sharper results from camera stability
A $20 phone tripod is a worthwhile investment if you'll shoot headshots regularly.
Timer or Remote
Tap to start the camera, then scramble into position? That's a recipe for awkward expressions.
Better options:
- Use the 3 or 10-second timer
- Use voice commands ("Hey Siri, take a photo")
- Use a Bluetooth remote (inexpensive and useful)
- Use earbuds with volume buttons as a remote trigger
- Have someone else trigger the camera
Preparing Yourself
Clothing
Good choices:
- Solid colors (avoid very bright colors or busy patterns)
- Colors that complement your skin tone
- Necklines that look good in frame (collars often work well)
- Clothes that fit well and look neat
Avoid:
- Busy patterns that distract
- Logos or text
- Very casual clothing (unless your professional context is very casual)
- Clothing similar in color to your background
Grooming
For everyone:
- Hair neat and styled as you normally wear it professionally
- Clean face
- No distracting jewelry (keep it simple)
Makeup (optional):
- If you wear makeup, subtle is usually better than dramatic
- Matte finish reduces shine from lights
- Photography doesn't require heavy makeup
Glasses
Glasses create common problems:
- Reflections of lights, windows, or the camera
- Portrait Mode edge detection failures
- Glare that obscures eyes
Solutions:
- Tilt glasses down slightly to angle reflections away
- Adjust lighting to eliminate reflections
- Consider removing glasses if reflections can't be controlled
- Check results carefully and reshoot if needed
Taking the Shot
Pre-Flight Checklist
Before shooting:
- [ ] Lens clean? (wipe it)
- [ ] Light positioned correctly?
- [ ] Background checked for distractions?
- [ ] Phone stable and framed?
- [ ] Timer or remote ready?
- [ ] Clothing and grooming checked?
Expression and Posture
Posture:
- Sit or stand straight but not stiff
- Slight forward lean engages the camera
- Turn body slightly (not straight-on) for more dynamic composition
- Shoulders relaxed, not hunched
Face:
- Turn head slightly rather than facing dead-on (usually more flattering)
- Chin slightly forward and down (defines jawline)
- Slight squint (engaged eyes look more confident than wide open)
Expression:
- Think of something genuinely pleasant right before the shot
- A slight smile is usually better than no smile
- The expression should match your professional context
Take Many Shots
Professional photographers take hundreds of frames for a few usable headshots. You should take dozens.
- Vary your expression slightly
- Try small head angle adjustments
- Take more than you think you need
- Review and refine
Even with great setup, expressions vary moment to moment. Quantity gives you options.
Post-Processing
Good headshots need minimal editing, but some adjustments help.
What to Adjust
Crop and straighten. Fine-tune the framing. Ensure nothing is tilted. The phone editing guide covers a complete workflow for natural-looking results.
Exposure. Brighten slightly if needed. Headshots often look better a touch brighter than normal.
Minor blemish removal. Most editing apps have tools to remove temporary blemishes (not permanent features, so keep it natural). Lightroom offers precise retouching tools for this.
Subtle skin smoothing. Very subtle. The goal is to reduce distracting imperfections, not create plastic-looking skin.
Eye brightening. A tiny bit of exposure increase on the eyes can add life.
What to Avoid
Heavy filters. Professional headshots shouldn't look filtered.
Dramatic color changes. Keep colors natural and skin tones realistic.
Obvious retouching. If the editing is noticeable, you've gone too far.
Face-altering filters. Don't make yourself look like someone else.
The result should look like you on a good day, not like a different person.
Evaluating Your Results
Check your headshots against professional standards:
Eyes sharp and bright? The eyes are the first thing viewers notice.
Lighting flattering? Soft shadows, no harsh contrasts, skin looks natural.
Background clean? Nothing distracting or inappropriate.
Expression appropriate? Confident, approachable, professional.
Technical quality good? Sharp, properly exposed, would look good at display sizes.
Does it look like you? Would someone recognize you from this photo?
If several frames meet these criteria, you have good options. Pick the one where your expression feels most natural.
Common Problems and Fixes
Harsh shadows under nose/chin
Fix: Move closer to the light source, add fill light with a reflector, or find softer light.
Shiny face/forehead
Fix: Blot with tissue before shooting, or use mattifying products, and reduce any remaining shine in editing.
Eyes look dull
Fix: Ensure the main light source creates catchlights (reflections) in the eyes. Add exposure to eyes in editing.
Background too busy or distracting
Fix: Move farther from background for more blur, or change location to cleaner background.
Expression looks forced
Fix: Take breaks. Think of something genuinely funny or pleasant. Have someone make you laugh before shots.
Portrait Mode edge problems
Fix: Try without Portrait Mode, or adjust position/background for cleaner edges.
When to Hire a Professional
Phone headshots can look genuinely professional, but there are situations where hiring a photographer makes sense:
- Very high-stakes contexts (executive team page, public figure)
- When you've tried and can't get results you're happy with
- When you need multiple people shot with consistent quality
- When you need maximum quality (large prints, high-end contexts)
A professional brings lighting equipment, experience with directing expressions, high-quality editing, and a level of polish that's harder to achieve alone.
But for LinkedIn, company directories, and most professional contexts, a well-executed phone headshot is genuinely sufficient.
Frequently Asked Questions
What's the best phone for headshots?
Recent iPhones and flagship Android phones all produce excellent results. The technique matters more than the specific phone model.
Should I use Portrait Mode?
Try both. Portrait Mode can look great but has edge detection limitations. Regular mode with a clean background often produces more reliable results.
How recent should my headshot be?
It should look like you do now. If your appearance has changed significantly, update your headshot.
Can I use my front-facing camera?
The main rear camera is significantly better in quality. Use a timer or remote so you can face the better camera.
Key Takeaways
- Use soft, directional window light or open shade for flattering illumination, and face the subject toward the light source.
- Use the 2x telephoto lens if available to reduce wide-angle distortion on faces, and maintain arm's length or more of distance.
- Choose a clean, simple, uncluttered background that does not compete with the subject for attention.
- Focus on the eyes and ensure the subject has a natural, relaxed expression rather than a forced smile.
More in This Guide
Continue improving your phone photography.