Flash earns its keep in bright sunlight, not in the dark.
That sounds backwards, so here it is plainly. The most useful time to put a flash on your camera is a cloudless afternoon. Fill flash uses a small burst of light to lift the shadows that hard sun carves into faces. It rescues backlit subjects from becoming silhouettes, opens up eye sockets at noon, and softens hat shadows, all while the photo still looks like it was taken in natural light.
It's also the fastest path from owning a flash to taking visibly better photos with it, and one of the core techniques in our guide to flash. No stands, no modifiers, no triggers. One flash, one setting, and an understanding of what the sun is doing to your subject.
Why Flash Belongs in Bright Sunlight
In a dark room, your flash is the only meaningful light source, a small, hard source pointed straight at your subject. That's the recipe for the flat snapshot look covered in why your flash photos look harsh.
In bright sun, the roles reverse. The sun handles the heavy lifting, and your flash only has to brighten the shadows, not light the whole scene.
The problem fill flash solves is contrast. Direct sun creates shadows three to four stops darker than the lit side of a face. Your eyes handle that range without effort. Your sensor doesn't. Expose for the bright side and the shadows go nearly black. Expose for the shadows and the highlights blow out.
A speedlight can't out-muscle the sun across a landscape, but it doesn't need to. It needs to brighten a face-sized area from a few feet away. At that job, it's excellent.
Three situations come up constantly outdoors, and fill flash fixes all of them.
Backlit subjects rendered as silhouettes. Put the sun behind someone and you get gorgeous rim light on their hair and shoulders, but their face falls into shadow. Shooting into the light creates some of photography's best images, and it usually costs you the face. Fill flash keeps the glowing background and lifts the face to meet it.
Raccoon eyes at noon. Overhead sun turns eyebrows into awnings, casting shadows straight down into the eye sockets until the eyes disappear into dark pits. Midday sun has a bad reputation largely because of this effect. A burst of fill from camera height reaches under the brow and brings the eyes back.
Hat shadows. Brims do exactly what they're designed to do, which is shade the face, leaving a hard shadow line across the eyes. Weddings, ball games, beach days. Anywhere people wear hats in the sun, fill flash earns its place.
All three are the same physics, a small bright source casting harsh shadows exactly where you don't want them. Fill flash doesn't remove those shadows. It brightens them until they look intentional.
How Fill Flash Actually Works
The sun stays the key light. That's the entire concept. Your flash adds just enough light to the shadows that detail comes back, while the sun continues to define the shape and direction of the lighting.
A reflector does the same job, bouncing sunlight back into the shadow side of a face. Fill flash is a reflector with a battery, minus the assistant and the wind.
The target ratio is simple. Keep the fill one to two stops below the key. The shadows stay shadows, just with visible detail in them. If the fill matches the key, the face goes flat and waxy, and everyone can tell a flash fired.
Flash light obeys the inverse square law, so doubling the flash-to-subject distance cuts the light to a quarter, a two stop loss. Your subject a few feet away gets meaningful fill while the background fifty feet behind them gets effectively nothing. The scene stays natural. Only the face changes.
The Fill Flash Recipe
Here's the procedure that handles most outdoor situations:
-
Expose for the ambient scene first. Use aperture priority or manual and set the exposure for the background, the sky, or the bright parts of the scene. Ignore your subject's dark face for now. If they're backlit, expose so the sky holds its color.
-
Turn the flash on in TTL mode. TTL fires a quick preflash, measures what bounces back through the lens, and sets the flash power automatically for each shot.
-
Dial flash exposure compensation to -1. This is the setting that makes it fill rather than blast. You're telling the flash to deliberately deliver one stop less than a full exposure, which keeps the sun in charge.
-
Take a shot and look. Face still too dark? Move toward -2/3. Fill too obvious? Slide toward -2. Most outdoor portraits land somewhere between -1 and -2.
-
Check your shutter speed. If the camera wants something faster than around 1/200 to 1/250, you've hit the sync ceiling. More on that below.
That's it. The flash exposure compensation dial is doing the creative work.
Why TTL Shines Outdoors
Fill flash outdoors is the situation TTL was built for.
Outdoors, everything moves. Your subject walks. You step back for a wider frame. A cloud crosses the sun. Every one of those changes the flash power needed, and TTL re-meters every frame through the lens. You shoot, it adapts.
Manual flash works differently. You set a fixed power fraction (full, 1/2, 1/4, 1/8, with each halving giving one stop less light) and the flash fires at that power no matter what. In a studio, where nothing moves, manual wins. On a beach with a five-year-old, it means re-doing math between every frame.
The math itself isn't hard. A flash's guide number equals distance times f-number at ISO 100, so a flash with a guide number of 80 in feet can fully light a subject 10 feet away at f/8. Good to know for understanding range limits, slow to recalculate while a kid sprints toward the water.
TTL with negative compensation is the right default outdoors. Manual takes over when subject and flash hold still. The full comparison lives in TTL vs manual flash, and the metering rules TTL is automating are covered in how flash exposure works.
The Sync Speed Ceiling
Bright light pushes your shutter speed up, and flash puts a hard ceiling on how far up it can go. You will hit this ceiling doing fill flash.
Most cameras with mechanical shutters use two curtains that travel across the sensor. At or below the sync speed, around 1/200 to 1/250 on most bodies, the first curtain fully opens before the second starts closing, so for a moment the entire sensor is exposed at once and the flash fires then. Above the sync speed, the second curtain chases the first and the sensor only ever sees a moving slit. A flash burst lights one band of the frame and leaves the rest dark.
Now consider a sunny day. At ISO 100, a correct ambient exposure might be f/8 at 1/400, well past the ceiling. Your options:
- Stop down the aperture. f/11 at 1/200 captures the same ambient exposure. The cost is a less blurred background.
- Lower the ISO. If you're already at base ISO, this door is closed.
- Add an ND filter. Cutting the light lets you keep a wide aperture and a legal shutter speed. More gear, more fiddling.
- Use high-speed sync. HSS pulses the flash rapidly so light hits every slice of the traveling slit. It works, but expect to lose two or more stops of effective output, plus faster battery drain. Fine at close range, limiting at a distance.
For typical fill flash, the simplest answer is to accept f/8 to f/11 and a shutter speed at or under sync. The mechanics and the HSS tradeoffs get full treatment in flash sync speed and high-speed sync explained.
Worked Examples
Two situations you'll actually meet, with numbers.
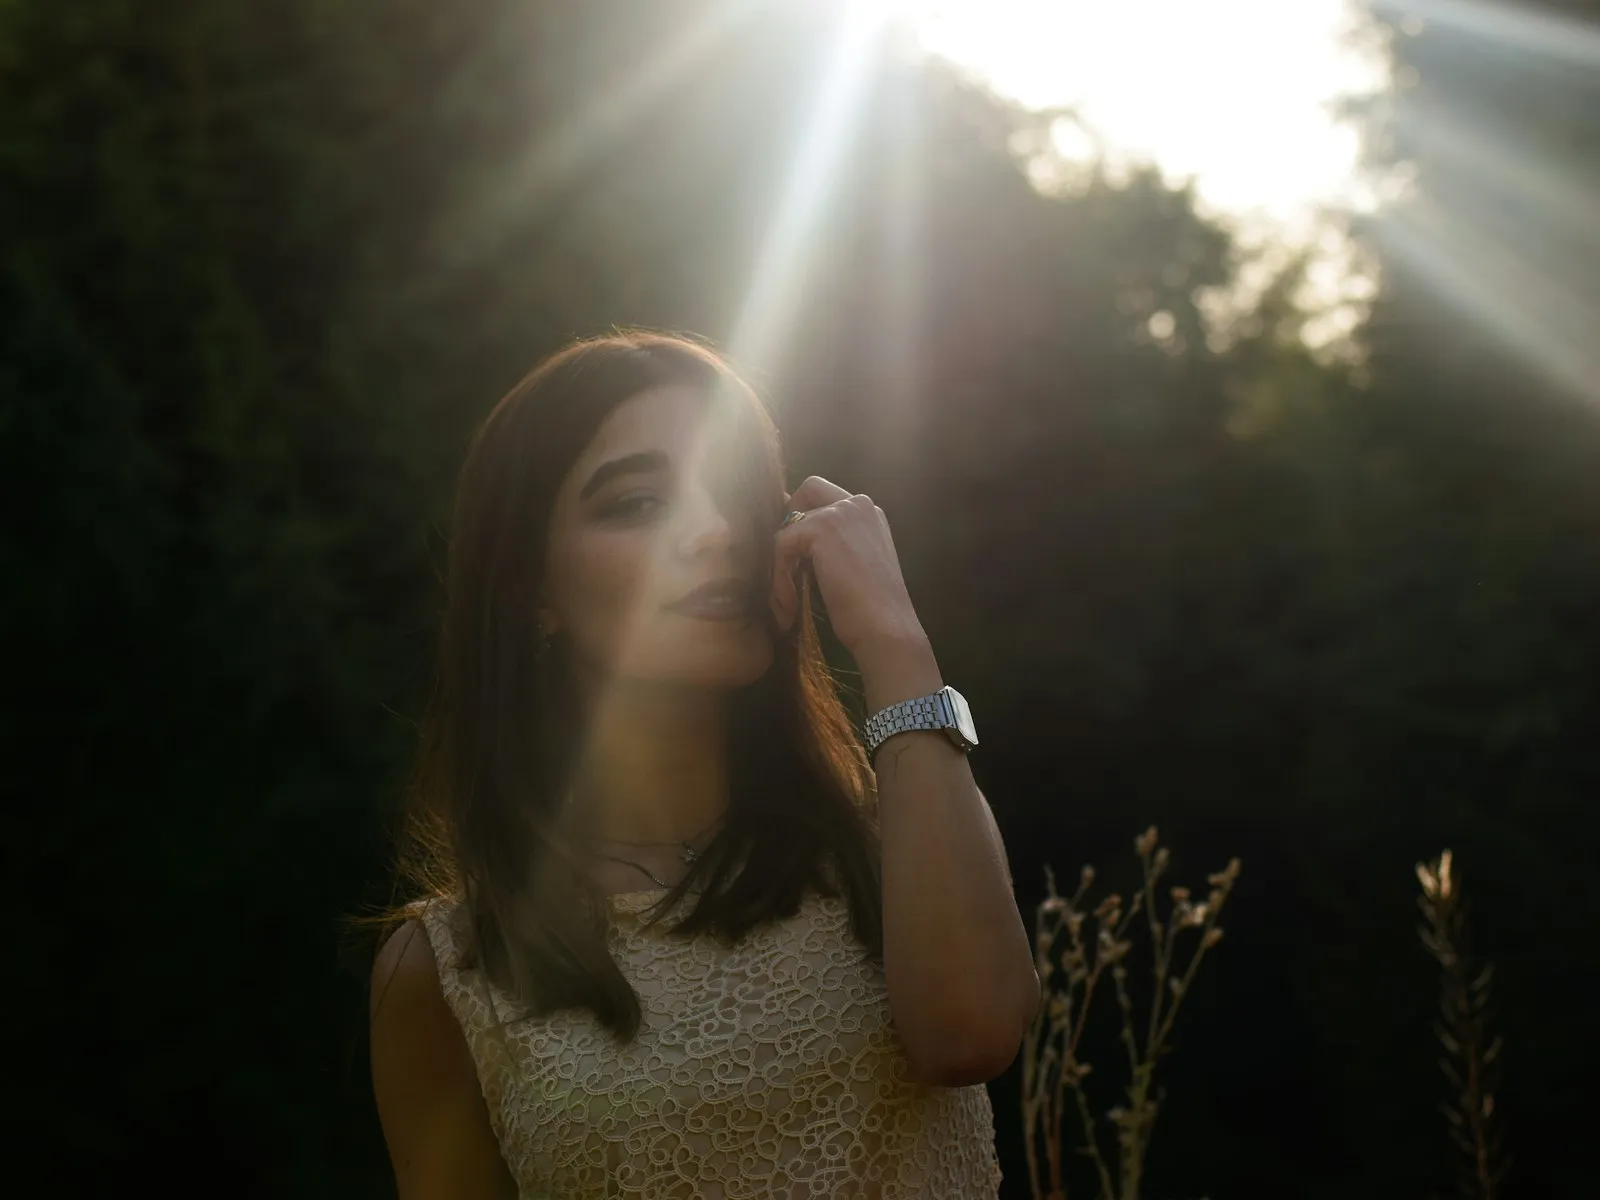
A Backlit Portrait at the Beach
Scene: Late afternoon, sun low and behind your subject, bright water and sky filling the background.
Settings: Meter the sky, not the face. You'll land somewhere near ISO 100, 1/200, f/8 to f/11 depending on how low the sun is. The face will look two to three stops underexposed in a test shot. That's expected. Now flash on, TTL, compensation at -1.
Result: The rim light on the hair stays. The sky keeps its color instead of blowing to white. The face comes up to within a stop of the background and the shot looks like a glossy natural light portrait, not a flash photo.
Watch for: Distance. An on-camera speedlight filling at f/11 from 15 feet may be near its limit. If the fill looks weak even at 0 compensation, move closer, open up a stop, or raise the ISO and rebalance.
A Noon Event in Overhead Sun
Scene: An outdoor gathering at midday. Sun straight overhead, eye sockets in shadow, hard shadows under chins and hat brims.
Settings: Sunny conditions at ISO 100 put you around 1/200 at f/11. Flash on, TTL, compensation at -1. For candids, stay within about 10 feet so the flash isn't straining.
Result: Eyes come back out of their sockets, chin shadows lift, and small catchlights appear. People look like they were photographed in nicer light than they were standing in.
Watch for: Pale clothing and foreheads near clipping. The flash adds light to areas the sun already lit, so if highlights were borderline, back the ambient off a third of a stop.
The Subtlety Test
Good fill flash is invisible. The test is simple. Would someone looking at the photo know a flash fired?
The tells of overdone fill are easy to spot. Faces that look waxy and evenly lit while everything else has contrast. A second faint shadow under the chin pointing the opposite direction from the sun's shadows. A subject who reads brighter than the scene they're standing in, like they were cut out and pasted on.
The one visible signature you actually want is the catchlight, a small sparkle in each eye that brings a face to life. Catchlights plus lifted shadows plus a single believable set of sun shadows means you nailed it.
Sometimes you want flash to be visible, with darkened dramatic skies and a subject who pops off the background. That deliberate look has its own ratios, and balancing flash with ambient light covers it. Fill flash is the opposite goal. The best compliment a fill flash photo can get is nobody mentioning the light at all.
Common Fill Flash Problems
Problem: Faces look waxy and flat. Solution: Too much fill. Dial the flash compensation from -1 toward -2 until dimension returns.
Problem: A dark band across part of the frame. Solution: Your shutter is above sync speed. Drop to 1/200 or slower and rebalance the ambient exposure with aperture or ISO.
Problem: The flash seems to do nothing. Solution: You're probably out of range for your aperture. Inverse square falloff is brutal. Move closer, open up a stop, or raise ISO.
Problem: Subjects blink in every frame. Solution: Some people react to the TTL preflash. If your camera has flash exposure lock, fire the preflash early, then take the photo a beat later.
Key Takeaways
- Use fill flash in bright sun to lift shadows on backlit or harshly lit subjects while the sun remains the key light.
- Set TTL flash exposure compensation between -1 and -2 so the flash fills shadows without overpowering the ambient exposure.
- Expose for the bright background first, then let the flash bring your subject up to a believable level.
- Check your shutter speed against the sync ceiling, around 1/200 to 1/250, before trusting any outdoor flash exposure.
More in This Guide
Continue building your flash skills.